Wednesday, December 31, 2008

Bridal Henna - palms in process

bridal henna tattoo, fine line henna in processI wish I had remembered to take more photos of this bridal henna tattoo. We were actually able to finished the fingertips with bold tear drops, dots & flourished that met the pattern you see here in the photo.

The finish for the backs of the hands featured compatible floral & paisley accents that were embellished with the little glove spots.. giving the look of wearing an old fashioned glove. As this was henna in the winter time, I used plenty of lemon sugar glaze to help the henna stay wet as long as possible & blow drying from time tot time to help open the pores.

It was important that we finish the henna as quickly as possible, so I will hope to receive photos of the finished color sometime next week. Stay tuned!

Thursday, December 25, 2008

सोलकढी - Solkadhi

Solkadhi in English

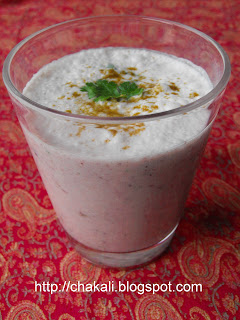
Solkadhi is a refreshing appetizer drink originated in Konkan region, Maharashtra. Solkadhi is made of Kokum fruit, Coconut milk and flavored with Garlic and Cumin. Konkani or Malvani cuisine is little spicy and solkadhi gives soothing effect after hot and spicy yet very delicious meal. Also kokum helps in digestion process.
Solkadhi is served chilled or lukewarm.

वाढणी: दिड कप

Maharashtrian, Solkadhi, Marathi, Kokum Kadhi, Malvani Kadhi, Konkani Recipes
साहित्य:
७ ते ८ आमसुलं
१ कप नारळाचे दूध
१ ते २ हिरव्या मिरच्या, बारीक चिरून
२ लसूण पाकळ्या
२ टेस्पून कोथिंबीर, बारीक चिरून
१/२ टिस्पून जिरेपूड
चवीपुरते मिठ
१/२ टिस्पून तूप
१/२ टिस्पून जिरे

कृती:

१) आमसुलं १/२ कप गरम पाण्यात भिजत टाकावीत. अर्ध्या-पाऊण तासाने त्याच पाण्यात आमसुलं कुस्करून घ्यावीत आणि पाणी गाळून घ्यावे.
२) कोथिंबीर आणि मिरची एका वाडग्यात घ्यावे. त्यात किंचीत मिठ घालून हाताने किंवा चमच्याने कुस्करावे.
३) लसूण बारीक चिरून घ्यावी.
४) जिरे किंचीत कुटून घ्यावे.
फोडणी न करता सोलकढी ::::
नारळाच्या दुधात आमसुलाचे पाणी, कुस्करलेली कोथिंबीर मिरची, चिरलेली लसूण आणि कुटलेले जिरे मिक्स करावे. चवीपुरते मिठ घालावे.
फोडणी केलेली सोलकढी::::
नारळाच्या दुधात आमसुलाचे पाणी, कुस्करलेली कोथिंबीर मिरची आणि चिरलेली लसूण घालून मिक्स करावे. चवीपुरते मिठ घालावे. कढल्यात तूप गरम करून त्यात कुटलेले जिरे घालून हि फोडणी नारळ दुधाच्या मिश्रणात घालावी आणि निट मिक्स करावे.
थंडच सर्व्ह करावे किंवा अगदी मंद आचेवर कोमटसर करावे जास्त गरम करू नये. सर्व्ह करताना वरून जिरेपूड भुरभूरावी. जिरेपूड आधीच मिक्स करू नये नाहीतर सोलकढीचा रंग बदलतो.
सोलकढी नुसतीच किंवा भाताबरोबर खायलाही छान लागते.

टीप:
१) १/४ कप घट्टसर आंबट ताक घातले तर खुप छान चव येते.
२) कोकमाचे आगळ म्हणजेच साखरविरहित कोकमाचा घट्ट कोळ (Kokum Concentrate) बाजारात विकत मिळतो. ते वापरूनही सोलकढी बनवता येते.

Labels:
Solkadhi, Kokum Kadhi

Konkani Solkadhi

Solkadhi in Marathi

konkani solkadhi, coconut drink, kokum kadhi, kadi
Ingredients:
7 to 8 Kokum
1 cup Coconut Milk
1 Green Chili, Finely chopped
1 or 2 Garlic Cloves, finely chopped
2 tbsp Cilantro, finely chopped
1/2 tsp Cumin Powder
Salt to taste
1/2 tsp Ghee
1/2 tsp Cumin seeds

Method:
1) Soak Kokum into 1/2 cup Hot water for 30 to 45 minutes. Squeese and strain.
2) Take Cilantro and 1/4 tsp Salt in a bowl and crush by fingers nicely. Take green chili and little salt, crush it by using spoon.
3) Chop Garlic finely.
4) Crush Cumin seeds coarsely.
Without Temering
In a bowl, add Coconut milk, Kokum water, crushed Cilantro and Chili, choppd Garlic and crushed cumin seeds. Add little salt if needed. Mix nicely.
With Tempering
In a bowl, add Coconut milk, Kokum water, crushed Cilantro and Chili, choppd Garlic. Add little salt if needed. Stir nicely. Heat a small saucepan, add Ghee. Once Ghee becomes hot add crushed cumin seeds and pour this tempering in Coconut milk mixture. stir nicely.
Solkadhi is generally served cold, but it can be serve lukewarm. While serving, sprinkle little Cumin powder. Do not mix Cumin Powder before serving, It will make the color little dull.

Note:
1) Add 1/4 cup Sour buttermilk to enhance the taste.

Tuesday, December 23, 2008

मेक्सिकन राईस - Mexican Rice

Mexican Rice in English

वाढणी २ जणांसाठी

Mexican Cuisine is famous for flavorful and colorful dishes. Previously I had posted few Mexican recipes like Mexican Salad, Red Beans with Rice and Quesadilla which are little Indianised way. Today I am posting recipe of Mexican Rice which is sauteed in Pure Ghee. Because of Ghee Rice becomes more flavorful and delectable.

Mexican Rice recipes, Bean Rice, Spanish Food, Tex mex food, corn and bean rice
साहित्य:
१/२ कप तांदूळ
३ कप वेजिटेबल स्टॉक
२ टेस्पून तूप
१ टेस्पून लसूणपेस्ट
१ कप कांदा, पातळ उभा चिरून (लांबी एक इंच)
१/२ कप भोपळी मिरची, लहान चौकोनी तुकडे
१/२ टिस्पून लाल तिखट
१ मोठा किंवा २ मध्यम टॉमेटो [१/२ ते ३/४ कप Canned Chopped Tomatoes]
१/२ कप कोबी, उभी चिरून
१/२ कप पाती कांदा, बारीक चिरून
१/४ कप ड्राय रेड बिन्स [१/२ कप कॅन्ड बिन्स]
२ टेस्पून उकडलेले मक्याचे दाणे [२ टेस्पून कॅन्ड मक्याचे दाणे]
१ तमालपत्र
चवीनुसार मिठ
किसलेले चिज (ऐच्छिक)

easy mexican rice recipe, authentic mexican food, mexican red rice
कृती:
१) जर कॅनमधील बिन्स वापरणार असाल तर तुम्ही लगेच हा भात करू शकता. पण ड्राय रेड बिन्स वापरणार असाल तर ६ ते ७ तास बिन्स भिजवून ठेवाव्यात. नंतर थोडे मिठ घालून प्रेशर कूकरमध्ये मध्यम शिजवून घ्याव्यात. बिन्स अख्ख्या राहिल्या पाहिजेत.
२) तांदूळ स्वच्छ धुवून घ्यावा. पॅनमध्ये स्टॉक गरम करावा. त्यात धुतलेले तांदूळ घालावे. थोडे मिठ आणि तेल घालून तांदूळ मोकळा शिजवून घ्यावा. भात शिजला कि गाळून घ्यावा. परातीत किंवा ताटलीत मोकळा करून गार करावा.
३) खोलगट पॅनमध्ये पाणी गरम करावे. उकळत्या पाण्यात टॉमेटो घालावे. ४५ सेकंदांनंतर गॅस बंद करावा. लगेच टॉमेटो बाहेर काढून गार पाण्यात घालावेत, यामुळे टॉमेटोची साले निघतील. ती काढून आतला गर अलगद काढून सुरीने बारीक चिरून घ्यावा.
४) नॉनस्टिक पॅनमध्ये तूप गरम करावे त्यात तमालपत्र आणि लसूणपेस्ट परतावी. लाल तिखट आणि कांदा घालून परतावे. कांदा १/२ मिनीटंच परतावा आणि लगेच भोपळी मिरची घालावी. अर्धवट शिजवावे आणि त्यात टॉमेटो घालून थोडावेळ परतावे. तमालपत्र काढून टाकावे.
५) नंतर शिजवलेल्या बिन्स आणि मक्याचे दाणे घालून १/२ ते १ मिनीट परतावे. शिजवलेला भात घालून मोठ्या आचेवर परतावे. गरजेपुरते मिठ घालावे.
६) कोबी आणि थोडा पाती कांदा घालून परतावे. सर्व्ह करताना किसलेले चिज आणि पाती कांदा घालावा.

टीप:
१) वेजिटेबल स्टॉक नसेल किंवा करायला वेळ नसेल तर तांदूळ साध्या पाण्यातही शिजवू शकतो.

Labels:
Mexican Corn and beans rice, Mexican veg Red rice, texmex food

Mexican Rice

Mexican Rice in Marathi

Serves: 2 persons

Mexican Rice recipes, Bean Rice, Spanish Food, Tex mex food, corn and bean rice
Ingredients:
White Rice 1/2 cup
3 cup Vegetable Stock
Ghee : 2 tbsp
Garlic Paste : 1 tbsp
Onion : 1 cup
Bell Pepper: 1/2 cup
Red Chili Powder: 1/2 tsp
Tomato : 1 big
Cabbage : 1/2 cup
Green Onion : 1/2 cup
Dried beans : 1/4 cup (OR 1/2 cup canned beans)
Boiled Corn : 2 tbsp
Salt to taste
Bat leaf 1
Grated cheese (Optional)

easy mexican rice recipe, authentic mexican food, mexican red rice
Method:
1) Soak 1/4 cup Dried Red Beans in water for atleast 6 to 7 hours. Pressure cook to 2 to 3 whistles. Do not overcook, otherwise beans could crack and will not taste good. Beans should be cooked properly without cracking. (You can use 1/2 cup Canned Beans instead)
2) Wash Rice and drain. Bring vegetable stock to boil. add washed rice, little salt and a tsp Oil. Stir nicely. Once rice is done, drain water and spread in a plate. Let it cool down.
3) Blanch Tomatoes and remove the skin and seeds. Chop blanched tomatoes to very small cubes.
4) Heat 1 tbsp Ghee in a non-stick pan. Add Bay leaf and Garlic paste, saute for few seconds. Put some Red Chili Powder and Onion. Saute for 1/2 minute and add Bell pepper cubes. Once Bell Pepper is half done, add tomato and saute for couple of minutes. Remove the Bay leaf.
5) Now put cooked beans and Corns, stir for 30 to 60 seconds. Add cooked rice and toss over high heat. Add salt if needed.
6) Add little Cabbage and green onion saute for 10-15 seconds. Transfer to serving plate, Garnish with grated cheese and green onion.

Labels:
Beans Rice, Mexican Rice

Thursday, December 18, 2008

बटाटापूरी - Batata Puri

Batata Puri in English

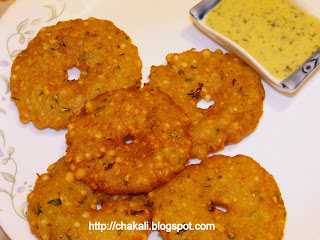
In India, Sabudana or Sago has a unique importance during Fasting. Khichdi, Vada, Kheer (Pudding) , Thalipith (Pancakes) made of Sabudana taste just amazing. Sabudana Vada is favorite in India, especially in Maharashtra because of its delicious taste and crispy texture.
Batata Puri (Potato Puri) is a version of Sabudana Vada. But Batata Puris are more crispy than Sabudana Vada. This recipe would be a nice alternative who fasts once in a week and searching something new to try other than routine fasting food.

उपवासाला आपण घरी साबुदाणे वडे बर्‍याचदा करतो, बटाटापुरी हि साबुदाणा वड्याच्या साहित्यापासूनच बनवली जाते पण पदार्थांचे प्रमाण आणि पद्धत थोडी निराळी असते. तसेच चवीलाही थोडी वेगळी आणि खुसखूशीत लागते. नक्की करून पाहा !!

वाढणी: मध्यम १२ पुर्‍या

Potato Recipe, Indian Food, Fasting vegetarian recipe, Upaas, Marathi Recipeसाहित्य:
२ मोठे बटाटे, उकडलेले
१/२ कप साबुदाणा
७ ते ८ मिरच्या
१/४ कप कोथिंबीर, चिरून
१/२ टिस्पून जिरे
३ टेस्पून शेंगदाणा कूट
१ टिस्पून जिरेपूड
१ ते २ टेस्पून शिंगाडा पिठ (टीप)
चवीपुरते मिठ
तळण्यासाठी तेल

कृती:
१) १/२ कप साबुदाणा पाण्यात भिजवावा. अधिकचे पाणी काढून टाकावे. नंतर किंचीत पाणी घालावे. साबुदाण्याच्यावर १/२ सेमी येईल इतपत पाण्याची पातळी ठेवावी. साधारण ३-४ तास अशाप्रकारे भिजवून ठेवावे. भांडे वरून झाकावे.
२) मिक्सरमध्ये ७-८ हिरव्या मिरच्या, कोथिंबीर, जिरे आणि थोडे मिठ घालून बारीक करावे. पाणी घालू नये. जर मिक्सर नसेल तर मिरच्या आणि कोथिंबीर बारीक चिरून घ्यावी.
३) शिजवलेले बटाटे किसून घ्यावे. त्यात मिरची-कोथिंबीरीचा ठेचा, शेंगदाणा कूट, भिजवलेले साबुदाणे, जिरेपूड आणि शिंगाडा पिठ घालून निट मळून गोळा बनवावा. चव पाहुन, लागल्यास मिठ घालावे.
४) साधारण दिड इंचाचे गोळे करावे. तेल तापत ठेवावे. तेल तापले कि आच मिडीयम हायवर ठेवावी. एक प्लास्टिकचा जाड तुकडा घ्यावा. त्याला तेलाचा हात लावावा. प्रत्येक गोळा त्यावर जाडसर थापावा आणि मध्यभागी बोटाने भोक पाडावे. पातळ थापू नये, नाहीतर तेलात टाकल्यावर पुरी तुटते आणि विरघळते. (टीप)
५) पुरी तेलात टाकल्यावर ती झार्‍याने अजिबात पलटू नये. पुरी पलटली ती हमखास तुटते. पुरी जरा तळली गेल्यावर थोडा firmness येतो. त्यावेळी झार्‍याने अलगद तेलात बुडवावी म्हणजे वरच्या बाजूलाही छान ब्राऊन रंग येईल.
तळलेल्या पुर्‍या चटणीबरोबर सर्व्ह कराव्यात.
टीप:
१) पुरी तेलात टाकल्यावर तुटत असेल तर मळलेल्या पिठात एखादा चमचा शिंगाडा पिठ वाढवावे.
२) शिंगाडा पिठ घरात available नसेल आणि उपवासही नसेल तर शिंगाड्याऐवजी तांदूळाचे पिठ वापरले तरी चालते.
३) साबुदाणा खुप चिकट भिजवू नये, पुर्‍या तळताना त्या तेलात विरघळतात.
4) तिखटाच्या आवडीप्रमाणे मिरच्यांचे प्रमाण कमीजास्त करावे.

Batata Sabudana Puri (Potato Puri)

Batata Puri in Marathi

Servings: 12 puris (medium)

In India, Sabudana or Sago has a unique importance during Fasting. Khichdi, Vada, Kheer (Pudding) , Thalipith (Pancakes) made of Sabudana taste just amazing. Sabudana Vada is favorite in India, especially in Maharashtra because of its delicious taste and crispy texture.
Batata Puri (Potato Puri) is a sort of version of Sabudana Vada. But Batata Puris are more crispy than Sabudana Vada. This recipe would be a nice alternative who fasts once in a week and searching something new to try other than routine fasting food.

Potato puri, Aloo Pudi, Batata Poori, Upas padarth
Ingredients:
2 Potatoes, boiled and peeled
1/2 cup Sabudana (Sago)
7 to 8 Green chilies (Thai or Indian) (Note 4)
1/4 cup Cilantro, chopped
1/2 tsp Cumin Seeds
3 tbsp roasted Peanuts powder
1 tsp Cumin Powder
1 or 2 tbsp Shingada Pith (Water Chestnut Flour)
Salt to taste
Oil for Deep frying

Method:
1) Put Sago in a medium bowl. Add water and tumble a little with hands. Remove excessive water. Then again, add water 1/2 cm above the level of Sago. Do not add more than that, otherwise Sago would become soggy and sticky. Soak for 3 to 4 hours. Cover the bowl with any plate.
2) Grind Green chilies, Cilantro, Cumin seeds and little salt to coarse mixture. Do not add water while grinding. If you don’t have grinder or the quantity is too small for grinder, then just chop green chilies and cilantro finely.
3) In a mixing bowl, grate potatoes first. Then put Chili-Cilantro mixture to it. Also add Peanuts powder, Soaked Sago, Cumin powder and Chestnut flour. Mix well and make soft dough. Taste a small portion of this dough and add little salt if needed.
4) Divide this dough to equal portion and make round balls (approx 1 1/2 inch). Heat oil on medium heat. Take a thick plastic sheet. Grease your hand and plastic sheet with little oil. Put a ball over plastic and press down with fingers and make it flat to thick Pattie. Do not make it very thin, otherwise it could break while deep frying.
5) There should not be any cracks on the edges. If any, try to adjust with hands. Make a hole in the middle of Puri (Pattie) with Index finger.
6) Deep fry flattened Pattie or Puri into hot oil. Do not flip to other side, it could break otherwise. As we are not going to flip Puris, gently push it down into Oil for few seconds when Puri gets golden color and become little firm. Do not give pressure very harshly which could break the Puri.
Fry them until they turn to golden brown color.
Serve hot and crispy Puris with Coconut or Cilantro Chutney.

Note:
1) If Puris are braking while deep frying, Then add 1 or 2 tbsp Water Chestnut flour in the dough. Knead well, make Puris and deep fry.
2) If Chestnut flour is not available and if you are not fasting, use Rice flour instead of Chestnut flour. (As Rice is generally not allowed during fast)
3) Do not soak Sabudana into hot water. It would become soggy and sticky. This could cause to break puris while deep frying.
4) Adjust the quantity of chilies according to your taste.

Labels:
Batata Puri, Aloo Puri, Upvas food, Fasting Food, Sabudana Vada

Wednesday, December 17, 2008

Finished Color - More or Less

peacock tattoo finished colorI forgot to ask my friend to take a photo for me today. It was a beautiful, sunny day... I even had my camera.. but no.

So.. here is a photo taken at 9PM.. by me.. camera phone.. bad lighting.. sorry ;{ for poor quality.
However, I said I would post a photo of the finished color. I left the paste on for about two hours, then just did the olive oil after care.. and voila!

Tuesday, December 16, 2008

Practicing Peacock Arm Tattoo

henna tattoo pattern peacock patternInspired by the henna video showing work by the artists of Nepal, I decided to practice to improve both speed & style.

Here is a photo of late night henna practice where the work focused on creating an armlet tattoo. I feel very good about peacock faces in general.. and I am sure the eyes are improving.

I also feel better about my use of negative space, and am remembering to double line major design areas so that they really stand out.

Also, bolding or filling some areas also sees to help bring a design to life.

Of course the greatest difficulty I find when henna-ing myself is working upside down!

And then there is not smudging as I go! This is when the use of lemon sugar glaze & a blow dryer is priceless.

I can work out the pattern, spray, dry, and continue without having to be overly careful.

I will be able to put up finished color photos of this tattoo.. so ..

Stay tuned?


Namaste

भरली भेंडी - Bharli Bhendi Masala

Bharli masala Bhendi in English

restaurant style okra, home made stuffed okra fry, Bharva bhindi masala, bharwa bhindi masala
साहित्य:
२३ ते २५ कोवळी भेंडी (मध्यम आकाराच्या)
१/२ कप कांदा, उभा चिरून
१ टेस्पून जिरेपूड, १ टेस्पून धणेपूड, १ टिस्पून आमचूर पावडर
१/४ टिस्पून हळद, १ टिस्पून लाल तिखट
चवीपुरते मिठ
फोडणीसाठी:
३ टेस्पून तेल, १/४ टिस्पून मोहोरी, १/२ टिस्पून जिरे, १/४ टिस्पून हिंग, १/४ टिस्पून हळद
४-५ कढीपत्ता पाने
सजावटीसाठी कोथिंबीर

कृती:
१) भेंडी स्वच्छ घुवून, पुसून घ्यावी. भेंडीची देठं कापून घ्यावीत. प्रत्येक भेंडीला एका बाजूने चिर द्यावी पण दोन तुकडे करू नयेत.
२) जिरेपूड, धणेपूड, हळद, लाल तिखट आणि आमचुर पावडर एका लहान वाडग्यात एकत्र मिक्स करून घ्यावे. चवीपुरते मिठ घालावे. हे तयार मिश्रण प्रत्येक भेंडीमध्ये भरावे. तसेच भेंडी या मिश्रणात थोडी घोळवून घ्यावी. अशाप्रकारे सर्व भेंडी तयार कराव्यात. उरलेला मसाला नंतरच्या वापरासाठी ठेवून द्यावा.
३) नॉनस्टिक पॅन गरम करावा. त्यात ३ टेस्पून तेल घालून गरम होवू द्यावे. नंतर मोहोरी, जिरे, हिंग, हळद आणि कढीपत्ता पाने घालून फोडणी करावी. चिरलेला कांदा फोडणीस घालावा.
४) कांदा अर्धा शिजला कि त्यात भरलेली भेंडी घालावी. हलक्या हाताने, भरलेला मसाला बाहेर पडू न देता मिक्स करावे. ज्यामुळे तेल सर्व भेंडीला लागेल. गॅस एकदम मंद ठेवावा आणि वरून झाकण ठेवून भेंडी शिजू द्यावी. दर तीन ते चार मिनीटांनी भाजी हलक्या हाताने ढवळावी.
५) भेंडी शिजत आली कि उरलेला मसाला गरजेनुसार घालावा व लागल्यास किंचीत मिठ भुरभूरवावे.
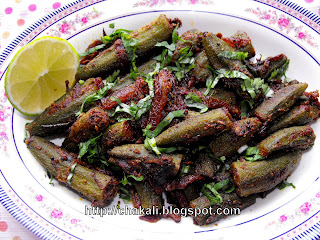
गरम गरम भरली भेंडी पोळीबरोबर सर्व्ह करावी.

टीप:
१) वाफ काढताना गरज वाटल्यास, भेंडीच्या बाजून एखादा चमचा तेल सोडावे.

Labels:
Masala Bhendi, Bhindi Masala, bhindi fry

Bharwa Bhindi [stuffed Okra]

Bharli Bhendi in Marathi

Bharli bhendi, Bharwa bhindi fry masala, quick and easy bhindi recipe, stuffed okra recipe
Ingredients:

25 No. Baby Okra
1/2 cup Onion, sliced lenthwise
1 tbsp Cumin Powder, 1 tbsp Coriander Powder,
1 tsp Amchoor Powder
1/4 tsp Turmeric Powder, 1 tsp Red Chili Powder
salt to taste
::::To Temper::::
3 tbsp Oil
1/4 tsp Mustard Seeds, 1/2 tsp Cumin seeds, 1/4 tsp Asafoetida powder, 1/4 tsp Turmeric Powder, 4-5 Curry leaves
Chopped Cilantro for Garnishing

Method:
1) Wash and clean Okra with water. Dry with paper towel. Cut the tips off on both the sides. Slit each Okra from one side. Do not cut into two pieces while slitting.
2) In a bowl add Cumin Powder, Coriander Powder, Turmeric Powder, Red Chili Powder, Amchoor Powder and little salt. Mix all the spices well. Stuff this mixture in each Okra, also dust okra in this mixture. Reserve remaining Spice blend for later use.
3) Heat a nonstick pan. Add 3 tbsp Oil and wait until heated. Then add Mustard seeds, Cumin seeds, Asafoetida powder, Turmeric Powder and Curry leaves. saute for 5 seconds and add sliced onion.
4) Once Onion is half done, add stuffed Okra and saute gently, without spilling stuffed masala out. Stir well and lets Oil spread evenly over each okra. Turn the heat on Low. Cover with lid and let the Okra cook. Give a nice stir after 3 to 4 minutes which will avoid burning Okra at the bottom.
5) When Okra is almost cooked, sprinkle reserved Spice blend according to your taste. Also add little salt if needed.
Serve Stuffed Okra with Chappati

Labels:
Bharwa Bhindi Masala, Bhindi Fry

Sunday, December 14, 2008

Winter Henna - How to Wrap for Good Color

henna tattoo on palmshenna tattoo for the back of the handsI am so fortunate to have met a new & wonderful goddess with a love of body art! Here are photos of her henna journey in December.. Jacksonville, Florida.

The first photo in this series is of the palms of the hands. To accomplish this tattoo, I started with the Lotus Om on the left hand, then the mandala center on the right.. back to the left and so on.

The patterns were misted with a lemon sugar glaze and allowed to dry as we moved from hand to hand, finishing the palms... but stopping before we got to the tips of the fingers. This way, it is easy to turn the hand over, resting on the finger tips, to apply mehandi to the back of the hands.

It is very important to remind that henna is a heat activated body dye. What that means is that warm temperatures help open pores, keep palms warm & moist, thus allowing the henna to stay active on the body for a longer period of time. All these conditions make for a dark finished color & a longer lasting tattoo.

The second picture in this series shows the "henna wrapping" which is a photo of tissue (which is taped when necessary to keep the tissue in place) and the plastic gloves used to create a little henna spa.. or sauna.. to give dark color in the winter time.

The tissue actually sticks to the lemon sugar glaze that is regularly applied during the henna process, and the tape helps keep the tissue in place. The little gloves (food service grade) are also taped shut at the wrist for comfort. There are so many benefits to this method, which I always use for bridal henna to ensure the darkest color, winter or summer in this air-conditioned part of the country!

Photo three is Tara's peacock garden pattern. You may be able to see the head of the peacock page right, then notice the tail that spreads across her fingers. The little six petaled flowers that grace the back of her hand are traditional, as are the little dots.

Once the back of her hands was finished, we turned palms face up to spread henna paste to cover the tips of her fingers. Photo four show the joy of a good design... that the back of the hand is visually pleasing when presented with the palm. As always, I hope to be able to post finished color photos in the near future.

Although this pattern was completed on Saturday afternoon, the finished color will not reveal itself until Monday. Henna usually takes about 48 hours to develop. For more tips on how to have a successful henna tattoo, please visit my site, or browse other posts in this blog.

As you can see from the photos, Tara got her manicure before her henna... which will make her design last longer & provides us all with these lovely photos. Henna tattoo is available by appointment during the winter months for those who chose traditional patterns, palms and backs of hands.

Summer time is our henna party season.. for that little something, just for fun. Namaste!

Thursday, December 11, 2008

दाल माखनी - Dal Makhani

Dal Makhani in English

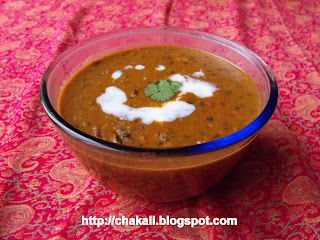
Dal Makhani is a delicacy from Punjab in India. This Dal is cooked in lot of Butter and taste great. (Dal - Cooked Lentils and Makhani (Makkhan in hindi) - Butter)
Traditionally this dal was cooked slowly, for hours, on charcoal. This gave it a creamier texture. Traditionally cooked in a Punjabi houses, it had ‘malai’ (thick creamy skin that forms on top of milk) or fresh butter added to it. Dal Makhani can be served with Paratha, Naan, Roti or even Rice.

वाढणी: ३ ते ४ जणांसाठी

Dal Makhni, Bukhara dal, Punjabi recipe, North Indian food, Desi Khanaसाहित्य:
१/२ कप अख्खे उडीद, सालासकट
१/४ कप राजमा (रेड बिन्स)
३ टेस्पून आलेलसूण पेस्ट
२ + २ बटर
१ टिस्पून जिरे
१/२ टिस्पून हळद
२ मध्यम टॉमेटो
१ टिस्पून गरम मसाला पावडर किंवा खडा मसाला (२ लवंगा, २ वेलची, १ तमालपत्र, १ लहान दालचिनीचा तुकडा)
१/२ कप कांदा, बारीक चिरून
२ टिस्पून लाल तिखट
१ टिस्पून धणेपूड
१ टिस्पून जिरेपूड
१/२ टिस्पून आमचूर पावडर
१/२ टिस्पून कसूरी मेथी
१/२ कप दूध
चवीपुरते मिठ
कोथिंबीर सजावटीसाठी

कृती:
१) उडीद आणि राजमा धुवून ६ ते ८ तास पाण्यात भिजवून ठेवावे. प्रेशर कूकरमध्ये भिजवलेले उडीद आणि राजमा दुप्पट पाणी घालून मऊसर शिजवून घ्यावेत. साधरण ४ ते ५ शिट्ट्या कराव्यात.
२) टॉमेटो प्युरीसाठी एक खोलगट पॅनमध्ये टॉमेटो बुडतील इतपत पाणी गरम करावे. त्यात २ टॉमेटो घालून २ मिनीटे उकळवावे आणि बाहेर काढून थंड होवू द्यावेत. साले आणि बिया काढून टाकाव्यात उरलेला भाग आणि थोडे पाणी मिक्सरमध्ये घालून प्युरी करून घ्यावी.
३) खोलगट पॅनमध्ये बटर घालून मध्यम आचेवर वितळू द्यावे. त्यात जिरे, हळद घालावी. [जर अख्खा गरम मसाला घालणार असाल तर तो आत्ता घालावा. काही सेकंद परतावे.]
४) आलेलसूण पेस्ट आणि लाल तिखट घालावे. काही सेकंद परतून त्यात चिरलेला कांदा घालून परतावे. कांदा निट परतल गेला कि टॉमेटो प्युरी घालून मध्यम आचेवर, पॅनवर झाकण ठेवून ५ ते ७ मिनीटे शिजू द्यावे. मधेमधे ढवळावे.
५) धणे-जिरेपूड घालावी आणि ढवळावे. शिजवलेले उडीद आणि राजमा घालावे. थोडावेळ मॅश करावे. गरजेपुरते पाणी घालून मधम आचेवर उकळी काढावी.
६) जर तुम्ही आख्खा गरम मसाला घातला नसेल तर आता गरम मसाला पावडर घालावी. नंतर कसूरी मेथी, मिठ आणि आमचूर पावडर घालून ढवळावे. अजून थोडे पाणी घालून घट्टपणा अड्जस्ट करावा. पॅनवर झाकण ठेवून २० ते २५ मिनीटे कमी आचेवर शिजू द्यावे. मधेमधे ढवळावे, डाळ पॅनच्या तळाला चिकटू देवू नये.
७) २ टेस्पून बटर घालून अजून १० मिनीटे वाफ काढावी. १० मिनीटांनी १/२ कप दूध घालावे आणि ढवळावे. परत झाकण ठेवून मध्यम आचेवर ५ मिनीटे वाफ काढावी.
गरम दाल मखनी कोथिंबीरीने सजवून रोटी, नान, किंवा भाताबरोबर सर्व्ह करावे.

Labels:
Dal Makhani, Malai Dal, Punjabi Dal Makhani

Dal Makhani

Dal Makhani in Marathi

Servings: 3 to 4

authentic Dal Makhani, Indian Dal recipe, Buttery Dhal, Punjabi Food
Ingredients:
1/2 cup Whole Urad (Black)
1/4 cup Rajma (Red Beans)
3 tbsp Ginger Garlic Paste
2 + 2 tbsp Butter
1 tsp Cumin seeds
1/2 tsp Turmeric Powder
Puree of 2 medium Tomato
1 tsp Garam Masala Powder OR Whole Garam Masala (2 cloves, 2 Cardamom, 1 bay leaf, 1 stick of Cinnamon)
1/2 cup Onion, finely chopped
2 tsp Red Chili powder
1 tsp Coriander Powder
1 tsp Cumin Powder
1/2 tsp Amchoor Powder
1/2 tsp Kasoori Methi
1/2 cup Milk
salt to taste

Method:
1) Wash and soak Urad and Rajma beans in water for 6 to 8 hours. In a pressure cooker add soaked beans and twice amount of water than soaked beans. Pressure cook to 4 whistles.
2) Take a deep saucepan. Put two tomatoes in it and fill the saucepan with water enough to cover tomatoes. bring it to boil. Boil for 2 minutes. You will see the skin of tomatoes have been cracked. Turn off heat. Remove tomatoes from the water. Let it cool down. Peel off the skin and remove seeds. puree this pulp of tomato by adding little water.
3) Heat a deep saucepan over medium heat.. Add butter and let it melt. Then add cumin Seeds, Turmeric Powder. [If you are adding 'whole garam masala' then add it now. stir for few minutes.]
4) Add Ginger-Garlic Paste, Red Chili Powder and saute until light brown in color. Add finely chopped Onion and saute until translucent. Now add Tomato puree and let it cook over medium low heat for 5 to 7 minutes, stirring occasionally. Cover with lid.
5) Add Coriander-Cumin Powder and stir well. Add Cooked Dal and mash a little. Pour a cup of water if needed. Boil over medium low heat.
6) If you have not added 'Whole Garam Masala, add Garam Masala powder, Kasoori Methi, salt to taste and Amchoor Powder. Add enough water to adjust the consistency, cover with lid and cook for 20 to 25 minutes over medium low heat. Stirring Occassionally.
7) Add 2 tbsp Butter and cook for more 10 miutes. After 10 minutes, add 1/2 cup milk and stir nicely. Cook over very low flame for 5 minutes.
Serve hot with Roti, Naan Bread or White Rice.

Note:
1) Use Heavy cream instead of Milk for more creamy texture.

Labels:
Dal Makhani, Makkhan Dal, punabi dal

Tuesday, December 9, 2008

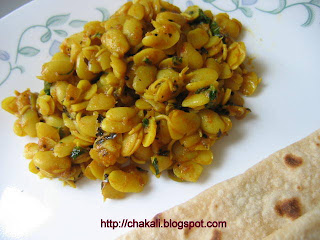
डाळींबी उसळ - Dalimbi Usal

Dalimbi Usal in English

वाढणी: २ जणांसाठी

valachi Usal, Dalimbyanchi Usal, Maharashtrian Cooking, Indian Curry, Kitchen Appliances, food tv

साहित्य:
३/४ कप वाल
फोडणीसाठी:
१ टेस्पून तेल, १/४ टिस्पून मोहोरी, १/२ टिस्पून जिरे, १/८ टिस्पून हिंग, १/४ टिस्पून हळद, १/२ टिस्पून लाल तिखट
४ कढीपत्ता पाने
२ टेस्पून सुका नारळ
१ टिस्पून जिरे
१ टिस्पून गूळ
२ आमसुलं
१/४ कप कोथिंबीर
२ टेस्पून ओला नारळ
चवीनुसार मिठ

कृती:
१) वाल कोमट पाण्यात १० ते १२ तास भिजत ठेवावे. नंतर पाणी काढून टाकून भिजलेले वाल मोड आणण्यासाठी पंच्यात ८ ते १० तास गच्च बांधून ठेवावे. डाळींब्यांना मोड आले कि कोमट पाण्यात १० मिनीटे टाकून ठेवावे. डाळींब्या सोलून घ्याव्यात. मोड आलेल्या डाळींब्या हाताळताना त्या अख्ख्या राहतील याची काळजी घ्यावी. साधारण सव्वा ते दिड कप डाळींब्या होतील.
२) कढईत किसलेला सुका नारळ मध्यम आचेवर भाजून घ्यावे. नंतर जिरे खरपूस भाजून घ्यावे. नंतर भाजलेला नारळ आणि भाजलेले जिरे निट कुटून घ्यावे.
३) कढईत तेल गरम करावे. त्यात १/४ टिस्पून मोहोरी घालून तडतडू द्यावी. नंतर जिरे, हिंग, हळद, आणि लाल तिखट घालून फोडणी करावी. कढीपत्ता आणि कोथिंबीर घालावी. थोडावेळ परतून डाळींब्या घालाव्यात. हलक्या हाताने परतावे. थोडा पाणी घालावे. १ ते २ टिस्पून कुटलेले जिरे-खोबरे, आमसुलं आणि मिठ घालून वाफ काढावी.
४) डाळींब्या अर्ध्या शिजल्या कि गूळ घालून वाफ काढावी. डाळींब्या खुप नाजुक असतात पटकन मोडल्या जातात म्हणून हलक्या हाताने परतावे.
उसळ तयार झाली कि ओला नारळ घालावा. गरमागरम पोळ्यांबरोबर सर्व्ह करावे.

Labels:
Dalimbyanchi Usal, Valachi Usal, Dalimbi Usal

Dalimbi Usal

Dalimbi Usal in Marathi

Serves: 2 persons

valachi usal, dalimbya, food network, indian food, indian curry, Desi khana, Marathi jevan, Loose weight, fiber food, birade

Ingredients:
3/4 cup Vaal (Field Beans)
For Tempering
1 tbsp Oil, 1/4 tsp Mustard Seeds, 1/2 tsp Cumin seeds, 1/8 tsp Asafoetida Powder, 1/2 tsp Red Chili Powder
4 Curry leaves
2 tbsp Dry coconut, grated
1 tsp Cumin seeds
1 tsp Jaggery
2 Kokum
1/4 cup Cilantro, finely chopped
2 tbsp Fresh Coconut
salt to taste

Method:
1) Soak Vaal beans in lukewarm water for 10 to 12 hours. After 10 to 12 hours, drain water. Take a clean Cotton Cloth, transfer soaked Vaal beans in this cotton cloth. Hold all the edges together. Twist the edges and tie a knot tightly. Place in warm place for sprouting for about 8 to 10 hours. Once Vaal Beans are sprouted, loose the knot. Take a container half filled with lukewarm water. Transfer Vaal in it and let it stand for 10 minutes. Very gently remove the skin. These beans are very delicate and can get break because of harsh handling. After soaking 3/4 cup dried Vaal beans, we get 1 1/4 to 1 1/2 cup Dalimbya to make Usal.
2) Take a saucepan, add grated Dry coconut and roast over medium heat until brown in color. Then roast Cumin seeds until dark brown in color. Crush both to coarse Powder.
3) Heat a saucepan, add 1 tbsp Oil and wait until hot. Add and let splutter Mustard seeds. Add Cumin, Asafoetida, Turmeric Powder and Red Chili Powder. Also add Curry leaves and Cilantro, stir for few seconds. Add peeled Vaal Seeds. Stir very gently. Add little water, Kokum, and salt to taste. cover and cook for few minutes.
4) Once Vaal beans are half done, add little Jaggery. Cover and cook for few minutes. Vaal seeds are very delicate so handle carefully.
Once Usal is done sprinkle some fresh coconut. Serve hot with Chapatti.

Labels:
Marathi usal Recipe, Valachi Usal, Dalimbi usal

Thursday, December 4, 2008

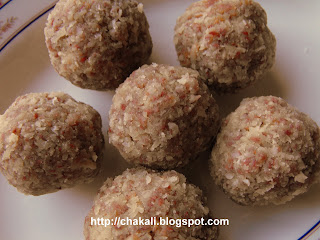
अळिव लाडू - Alivache ladu

Alivache ladu in English

वाढणी: साधारण ६ ते ७ मध्यम लाडू

Aliv Ladu, paushtik ladu, laddu recipe, Marathi Alivache Ladu
साहित्य:
१/८ कप अळीव (अळीव कुठे मिळतील? - टीप १)
१/४ कप दूध
३/४ कप गूळ
१ कप ओला नारळ

कृती:
१) अळीव गार दुधात ३-४ तास भिजत घालावेत. ३ ते ४ तासात अळीव छान फुगून येतील.
२) भिजवलेले अळीव, गूळ आणि नारळ एकत्र करून कढईत मध्यम आचेवर शिजवत ठेवावेत. मिश्रण कडेने सुटू लागले आणि मिश्रण दाटसर झाले कि लाडू वळावेत.

टीप
१) अळीव भारतामध्ये किराणा मालाच्या दुकानात मिळू शकतील. भारताबाहेर इंडीयन स्टोअर्समध्ये मिळेल.

Labels:
Healthy laddus, Aliv Ladu, Alivache Laadu

Aliv Ladu

Aliv Ladu in Marathi

Serves: 6 to 7 Laddus


Ingredients:
1/8 cup Aliv seeds (Halim Seeds / Garden cress seeds)
1/4 cup Milk
3/4 cup Jaggery
1 cup Scrapped Coconut (Fresh)

Method:
1) Soak Aliv Seeds in cold milk for approximately 3-4 hours. After 3-4 hours Aliv seeds will get swollen.
2) Heat a pan, add soaked Aliv seeds, Jaggery, Coconut. Mix well and simmer over medium heat. When the mixture becomes thick enough to form Laddus, turn off the heat and let the mixture become lukewarm. Make medium sized Laddus.

Labels:
Aliv Ladu, Maharashtrian Laddu, Healthy laddu

Tuesday, December 2, 2008

Fine Art Photo? Can you find the henna tattoo?

full palm henna tattoo traditional patternI am so happy to have been able to do this full hand henna pattern.

An "original" free hand design, the use of negative space makes a lovely pattern.

Can you find the henna in this photo?

I really like the mehandi against this fabric. I am sure there is another foto coming soon.. but as I have yet to see it, I share this image with you in hopes that you will find is as much fun as I do.

Wishing you warm nights.

Namaste,

Ann George

रताळे किस - Ratale Kis

Ratale Kis in English

वाढणी: २-३ जणांसाठी

ratalyacha kis, ratale kis, fasting food, fasting recipe, high carb food, low calorie food
साहित्य:
साडेचार कप रताळ्याचा किस (३ मोठी रताळी)
१ टेस्पून तूप
१/२ टिस्पून जिरे
४ हिरव्या मिरच्या, बारीक चिरून किंवा २-३ सुक्या लाल मिरच्या
१/४ कप कोथिंबीर
१/२ टिस्पून जिरेपूड
3 टेस्पून शेंगदाण्याचा कूट
चवीपुरते मिठ
१/२ टिस्पून साखर
२ टेस्पून कोथिंबीर
१ टेस्पून लिंबाचा रस
२ टेस्पून ओल्या नारळाचा चव

कृती:
१) रताळी स्वच्छ धुवून घ्यावीत. मी शक्यतो साले काढत नाही फक्त रताळ्यावर काळपट डाग असतील तेवढे सुरीने काढून टाकते. पण जर वाटले तर साल काढून मग किसावे. रताळी किसताना जवळ एक गार पाणी भरलेले पातेले तयार ठेवावे. अर्धे रताळे किसले कि या पाण्यात टाकावे म्हणजे किसलेले रताळे काळे पडणार नाही.
२) कढईत तूप गरम करावे त्यात जिरे, मिरच्या घालून फोडणी करावी. तसेच १/४ कप कोथिंबीर फोडणीस घालावी. लगेच पाण्यात घातलेले रताळे किस दोन्ही हातांनी पिळून कढईत टाकावे. जिरेपूड घालून निट परतावे. आधी मिठ घालू नये कारण रताळ्याचा किस शिजत आला कि बराच आळतो आणि मिठाचा अंदाज चुकू शकतो.
३) मध्यम आचेवर रताळ्याचा किस झाकण न ठेवता शिजू द्यावा. कालथ्याने निट ढवळावे. ६-७ मिनीटांत रताळ्याचा किस आळतो तसेच अर्धवट शिजतो. त्यात थोडे मिठ, साखर, शेंगदाण्याचा कूट घालून परतावे. थोडावेळ झाकण ठेवून शिजू द्यावे.
रताळ्याचा किस तयार झाला कि त्यात लिंबाचा रस, कोथिंबीर आणि खवलेला नारळ घालून दह्याबरोबर सर्व्ह करावे.

Labels:
Ratalyacha Kis, Potato hash, Indian sweet Potato hash, ratale kees

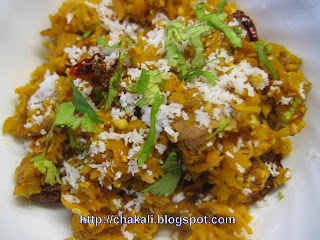
Ratale Kis - Sweet Potato Hash

Ratale Kis in Marathi

Serves : 2 to 3 persons

healthy food, ratale kis, sweet potato, Indian food, Maharashtrian food, Heart healthy food
Ingredients:
4 1/2 cup grated Sweet Potato (approx 3 big)
1 tbsp Ghee
1/2 tsp Cumin seeds
4 Green chilies, finely chopped OR 2-3 Dried Red Chilies
1/4 cup Cilantro, finely chopped
1/2 tsp Cumin Powder
3 tbsp Roasted Peanuts Powder
salt to taste
1/2 tsp Sugar
2 tbsp Cilantro for garnishing
1 tbsp Lemon Juice
2 tbsp Scrapped Coconut (Fresh)
Grater (Use Big Hole side)

Method:
1) Wash Sweet potatoes thoroughly with water. Generally I don't peel the skin. I only remove if any black spots on the skin of Sweet Potatoes. It doesn't change the taste of the dish if you grate it with skin. But if you want, you can peel the skin and then grate it. While grating Sweet potatoes, keep ready one medium and deep bowl, half filled with cold water. When you done grating with 1/2 Sweet Potato, put the grated potato into cold water. It will help to avoid Discoloration. Finish grating with all three Sweet Potatoes.
2) Heat a wok or pan over medium heat. Add Ghee and wait until it becomes hot. Add Cumin seeds, let it crackle. Add Chilies and Cilantro. Stir for 5 to 10 seconds. Now hold handful grated Sweet potatoes in one hand and squeeze tightly and remove excessive water. Add it to the pan. Repeat the same with the rest and stir gently. Add cumin Powder and stir nicely. Do not add salt at this moment because the grated potatoes will reduce in quantity after it gets cooked. It could become salty if you add salt before its done.
3) let the Potatoes cook over medium heat. Do not cover the pan. Stir gently in between. within 6 to 7 minutes grated potatoes get shrink but they are not cooked completely. Then add salt, sugar, peanuts powder and stir well. Now cover the pan with lid and let it cook for few minutes more.
Once Ratale Kis is done Garnish with Lemon Juice, Cilantro, and freshly scrapped coconut. Serve hot with plain Yogurt.

Labels:
Ratale kis, Sweet Potato recipe, Potato hash recipe