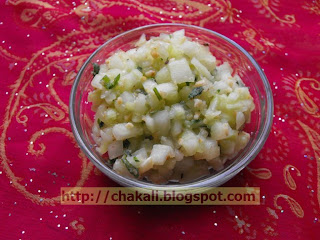
Khamang Kakadi (English version)
वाढणी : ३-४ जणांसाठी
साहित्य:
२ कप चोचवलेली काकडी (कृती - क्र. १)
३ हिरव्या मिरच्या बारीक चिरून
१ टिस्पून लिंबाचा रस
१/२ टिस्पून तूप
१/४ टिस्पून जिरे
३ ते ४ टेस्पून शेंगदाण्याचा कूट
२ टेस्पून चिरलेली कोथिंबीर
१ टिस्पून साखर
चवीपुरते मिठ
कृती:
१) काकडीची शेवटची दोन टोके कापावीत, आधी काकडी कडू नाहीये ना! हे चव घेवून पाहावे. नंतर काकडी सोलून चोचवून घ्यावी. चोचवलेल्या काकडीला थोडे मिठ चोळून एका वाडग्यात ठेवावे. मिठामुळे काकडीला पाणी सुटेल. हे पाणी काढून टाकावे तसेच चोचवलेली काकडी दोन्ही हाताने पिळून त्यातील अधिकचे पाणी काढून टाकावे. अशी पाणी काढून पिळलेली टाकलेली काकडी आपल्याला २ कप लागेल.
२) ही काकडी वाडग्यात घेऊन त्यात शेंगदाण्याचा कूट, चिरलेली कोथिंबीर, साखर घालून मिक्स करावे.
३) कढल्यात तूप गरम करून त्यात जिरे आणि चिरलेल्या मिरच्यांतील थोडी मिरची घालून फोडणी करावी व काकडीत घालावी.
४) उरलेली मिरची एका वाटीत घ्यावी. त्यात अगदी किंचीत मिठ घालावे (कारण आधीच काकडीला मिठ लावले आहे). चमच्याने किंवा हाताने चुरडावी आणि काकडीला लावावी. लिंबाचा रस घालून मिक्स करावे.
हि चविष्ट अशी खमंग काकडी उपवासाला किंवा इतर दिवशीही कोशिंबीर म्हणून जेवणात समाविष्ट करू शकतो.
Labels:
Cucumber Salad, kakadi Koshimbir recipe, Cucumbar Raita, Indian cucumber Raita
Thursday, July 31, 2008
Maharashtrian Cucumber Raita
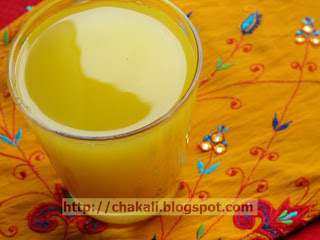
Khamang kakdi
Serves – 3 to 4
Ingredients:
2 cup finely chopped Cucumber (Step 1)
2 + 1 green Chilies, finely chopped
1 tsp Lemon juice
½ tsp Ghee
¼ tsp Cumin seeds
3 to 4 tbsp Peanuts powder
2 tbsp finely chopped Cilantro
1 tsp sugar
Salt to taste
Method:
1) Wash cucumber and cut both ends. Sometime cucumber has bitter taste, so always taste a little piece of cucumber before using it. Then peel and chop finely. If you have hand chopper, cut cucumber into big pieces and chop them by using chopper, make very small pieces. Then put chopped cucumber into a mixing bowl, rub little salt and keep aside for 4-5 minutes. Because of salt, cucumber will leave water. Remove excessive water, also squeeze cucumber by hand palms and try to remove the water as much as you can. We need 2 cups of squeezed cucumber.
2) Put this squeezed cucumber into another mixing bowl. Add peanuts powder, chopped cilantro, and sugar. Mix well.
3) In a small saucepan, heat Ghee. Add Cumin Seeds, 2 finely chopped green Chilies and pour this mixture to cucumber.
4) Put the remaining chopped chilies into a small bowl. Add very little salt (we have already rubbed salt to cucumber). Crush them with spoon and mix it with cucumber. Add Lemon juice and mix.
Serve in any meal as side dish..You can have it for your Upvas (fast)
Labels:
Cucumber salad, kakadi koshimbir recipe, cucumber raita, Indian cucumber raita
Wednesday, July 30, 2008
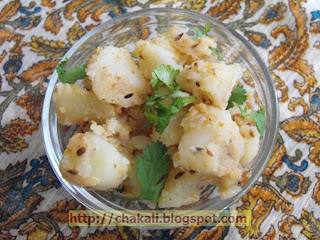
उपासाची बटाटा भाजी - Batata Bhaji
Upvasachi Batata Bhaji in English
वाढणी : २ ते ३ जणांसाठी
साहित्य:
२ कप शिजलेल्या बटाट्याच्या फोडी
१ टिस्पून साजूक तूप
१/२ टिस्पून जिरे
३-४ हिरव्या मिरच्या
२ टेस्पून शेंगदाण्याचा कूट
१ टिस्पून लिंबाचा रस
१/२ ते १ टिस्पून साखर
चवीपुरते मिठ
कृती:
१) बटाटे शिजवून घ्यावेत. बटाटे सोलून त्याच्या मध्यम फोडी कराव्यात.
२) कढईत १ टिस्पून तूप गरम करावे. त्यात जिरे आणि चिरलेल्या मिरच्या घालाव्यात. यात बटाट्याच्या फोडी घालून मध्यम आचेवर परतावे. चवीपरते मिठ आणि साखर घालावी, दाण्याचा कूट घालावा. झाकण ठेवून वाफ काढावी. २-३ मिनीटांनंतर त्यात लिंबू रस घालून मिक्स करावे.
टीप:
१) आवडीनुसार ताजा ओला नारळही घालू शकतो.
Labels:
Maharashtrian Recipe, upvas recipe, fasting recipe, batata bhaji, Potato Bhaji, Potato Sabji
Maharashtrian Potato bhaji
Upavasachi batata Bhaji (Potato curry for Fasting) in Marathi
This Bhaji (sabzi) is very easy to make, very delicious. We generally make this on Fast.
Ingredients:
2 cup potato cubes (boiled and peeled)
1 tsp Ghee
½ tsp Cumin seeds
3-4 green Chilies
2 tbsp Peanuts powder
1 tsp Lemon Juice
½ to 1 tsp Sugar
Salt to taste
Method:
1) First, boil and Peel potatoes. Make medium cubes.
2) Heat a wok, and then add 1 tsp ghee. Let the Ghee become hot, add cumin seeds and chopped green chilies. Add potato cubes. Stir on medium heat.
3) Add peanuts powder, salt and Sugar to taste. Stir well and cover with lid, let it cook for 2-3 minutes. After 2-3 minutes, add Lemon juice. Mix well.
Note:
Add fresh grated coconut to enhance the taste
Labels:
Maharashtrian Recipe, upvas recipe, fasting recipe, batata bhaji, Potato Bhaji, Potato Sabji
Tuesday, July 29, 2008
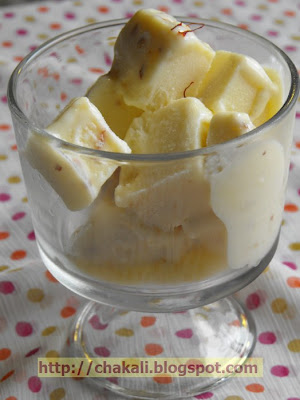
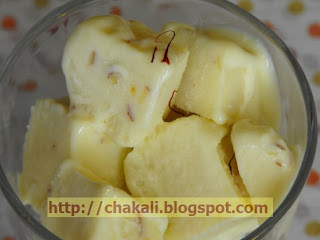
बदाम कुल्फी - Badam Kulfi
Badam Mava Kulfi (English Version)
वाढणी: २-३ जणांसाठी
साहित्य:
३ कप दुध (होल मिल्क)
१/४ कप ताजा मावा (साधारण ४ टेस्पून)
१/२ ते पाउण कप साखर
१/३ कप बदामाचे काप
२ टिस्पून कॉर्न फ्लोअर
१/२ टिस्पून वेलची पूड
चिमूटभर केशर
कृती:
१) बदामाची पूड करून घ्यावी. दूध गरम करून आटवावे. आटवतानाच ३-४ मिनीटांनी साखर घालावी.
२) साधारण अर्धे होईल इतपत आटवावे. आटवताना सारखे ढवळत राहावे ज्यामुळे दूध भांड्याच्या तळाला लागणार नाही.
३) मावा हाताने मोकळा करून घ्यावा. त्यातील गुठळ्या हाताने मोडाव्यात.
४) दोन टेस्पून गार दूधात कॉर्न फ्लोअर मिक्स करावे, हे दूध आटवलेल्या दूधात घालावे व ढवळावे. हळूहळू दुध घट्टसर होईल.
५) दुध घट्टसर झाले कि वेलची पूड, केशर, मावा दुधात घालावा. थोडे गरम करावे. सर्व निट मिक्स करावे. मिश्रण थोडे कोमट झाले कि कुल्फीपात्रात किंवा हिंडालियमच्या पात्रात मिश्रण ओतून फ्रिजरमध्ये सेट करण्यास ठेवावे.
६) कुल्फी घट्ट झाली सर्व्ह करावे.
Labels:
kulfi recipe, matka kulfi, badam Malai Kulfi, Mava Kulfi, Indian Icecream
Badam Malai Kulfi
Almond Kulfi in Marathi
Serves – 2 to 3
Ingredients:
3 cups whole Milk
¼ cup Fresh Mawa (2 Tbsp)
½ to ¾ cup Sugar
1/3 cup Almond pieces
2 tsp Corn Flour
½ tsp Cardamom powder
Pinch of Saffron
Method:
1) Grind Almond pieces to coarse Powder.
2) Heat a saucepan. Keep the heat on medium. Add milk and reduce it to half i.e. approximately 1½ cup. Add sugar while reducing milk. Stir continuously from start to end, to avoid milk sticking to the bottom.
3) Crumble Mawa with hands and remove all the lumps.
4) Take 2 tbsp cold milk in a small bowl. Add 2 tsp Corn Flour. Mix well and add it to the boiling milk. Milk will start thickening.
5) Once milk become thick; add Cardamom Powder, Saffron, and Mawa. Mix well and remove lumps. Mix well and remove from heat.
6) Let the mixture become little cool down. Then pour into Kulfi mold or any Icecream mold and set into freezer.
Labels:
kulfi recipe, matka kulfi, badam Malai Kulfi, Mava Kulfi, Indian Icecream
Sunday, July 27, 2008
Henna Fish - Tattoo for Festival Days
This little fish is a "chef's choice" pattern for the back of the hand. It took just a few minutes to create a henna pattern based on the koi.. or fancy goldfish concept.
Once the outline was drawn for the eyes & head, the rest of the fish just flowed along. You will notice the pattern is filled in with traditional henna components, the line, spot, curved and straight lines.
I hope you enjoy it. If you would like one, just stop by the Midnight Sun in Five Points, Riverside, Jacksonville, Florida.
Namaste!
Thursday, July 24, 2008
फडतरे यांची "कोल्हापूरी मिसळ" - Phadtare Misal
Phadtare's Kolhapuri Misal
कोल्हापूरातील फडतरे यांची मिसळ खुपच प्रसिद्ध आहे. मी त्यापद्धतीची मिसळ घरी बनवली होती. खुपच चविष्ट आणि चमचमीत पाककृती आहे.
त्याचा व्हिडीओ खाली दिला आहे. पण फडतरे यांनी hotel style सारखी जास्त प्रमाणावर हि मिसळ दाखवली आहे, म्हणून मी जशी मिसळ बनवली होती त्याचे प्रमाण दिलेले आहे.
पण त्यातील दोन चार जिन्नस (बडी इलायची, जाड मिठ, बेडगी मिरची तिखट, दगडफूल) घरात उपलब्ध नव्हते. त्यामुळे व्हिडिओ आणि खाली दिलेले प्रमाण याची सांगड घालून हि चविष्ट मिसळ नक्की करून पाहा.
वाढणी : ४ प्लेट
साहित्य:
::::बटाटा भाजी::::
२ ते अडीच कप बटाट्याच्या फोडी (शिजवून आणि सोलून)
३/४ कप कांदा (उभा चिरून)
२ टेस्पून तेल
फोडणीसाठी : १/४ टिस्पून मोहोरी, १/४ टिस्पून जिरे, १/२ टिस्पून हळद
३ ते ४ हिरव्या मिरच्या, बारीक चिरून
चवीपुरते मिठ
::::मटकी उसळ::::
३/४ कप मटकी (भिजवून मोड काढल्यावर दिड कप)
३/४ कप चिरलेला कांदा
१/२ कप चिरलेला टोमॅटो
१/२ टिस्पून हळद
२ टिस्पून लाल तिखट
१ टेस्पून धणेजिरे पूड
२ टिस्पून तेल
३/४ टिस्पून साखर
चवीनुसार मिठ
::::कट::::
४ टेस्पून तेल
३/४ कप उभा चिरलेला कांदा
१/२ कप चिरलेला टोमॅटो
१/२ टिस्पून हळद
२ टिस्पून लाल तिखट
१/४ कप ओला नारळ
गरम मसाला पेस्ट:
२ टेस्पून सुके खोबरे, ३ लवंगा, १ दालचिनीची लहान काडी, चिमूटभर जायफळ पूड, २ वेलची, ४ लसूण पाकळ्यांची पेस्ट, १ टिस्पून आलेपेस्ट, ३ हिरव्या मिरच्या, १ टिस्पून जिरे
Labels:
kolhapuri Misal, misal recipe, maharashtrian misal recipe, misal recipe video
Phadtare's Kolhapuri Misal Recipe Video
Phadtare Misal in Marathi
In Maharashtra Kolhapur is very famous for Misal. Misal is made by combining Potato Sukhi Bhaji, Matki Bhaji (Sabzi) and Very hot spicy Curry. Fadtare (surname) Misal is very popular in Kolhapur. I am posting a Video which shows how Misal prepared in "Fadtare Misal Centre".
Previously, I had posted Misal Recipe in my way, but this is something Original and Traditional way of making Misal.
I am giving list of ingredients which I had used to make Misal at home. Some of the Ingredients which are shown in the video (like Anise Star, Black Cardamom, Coarse Salt, Bedgi Mirchi Powder) were not available at home. So I made Misal without those items and still it tasted great.
Serves: 4 persons
Potato Bhaji (Potato Dry Sabzi)
2 to 2 ½ cup Potato Cubes (Boiled and peeled)
¾ cup Onion, sliced lengthwise
2 tbsp Oil
For Seasoning: ¼ tsp Mustard Seeds, ¼ tsp Cumin seeds, ½ tsp Turmeric Powder, 3-4 finely chopped green Chilies
Salt to taste
Matki Usal (Moth Beans Curry)
¾ cup dried Moth beans
¾ cup Onion, finely chopped
½ cup Tomato, finely chopped
½ tsp Turmeric Powder
2 tsp Red Chili Powder
1 tsp Coriander-Cumin Powder
2 tsp Oil
¾ tsp Sugar
Salt to taste
Kat (Spicy Curry)
4 tbsp Oil
¾ cup Onion, Sliced lengthwise
½ cup Tomato, finely chopped
½ tsp Turmeric Powder
2 tsp Red Chili Powder
¼ cup Fresh grated Coconut
Garam Masala:
2 tbsp Dry Coconut Powder, 2 Cloves, 1 inch Cinnamon stick, Pinch of Nutmeg powder, 2 Cardamom pods, 4 Garlic Clove’s paste, 1 tsp Ginger paste, 3 green chilies, 1 tsp Cumin Seeds
Method:
See the Video
Tuesday, July 22, 2008
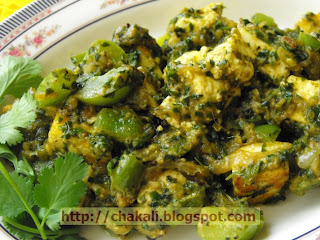
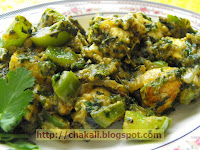
पनीर हरीयाली - Paneer Hariyali
Paneer Hariyali (English Version)
वाढणी : साधारण १ प्लेट (२ जण)
साहित्य:
३/४ कप फ्रेश पनीरचे तुकडे (साधारण १२-१४ मध्यम चौकोनी तुकडे)
१/२ कप भोपळी मिरचीचे चौकोनी तुकडे
३ टेस्पून दही
३/४ कप उभा चिरलेला कांदा
१ टेस्पून आलेलसूण पेस्ट
२ टेस्पून बटर
१/४ टिस्पून हळद
३-४ टेस्पून तेल
:::मसाला बनवण्यासाठी:::
१ काडी दालचिनी
४ काळीमिरी
३ लवंग
३ वेलची
१ टिस्पून धनेपूड
१ टिस्पून जिरेपूड
:::हिरवा मसाला बनवण्यासाठी:::
४-५ हिरव्या मिरच्या
१/२ कप पुदीना पाने
१/२ कप कोथिंबीर
कृती:
१) प्रथम दही १/२ ते पाऊण तास सुती कपड्यात घालून टांगून ठेवावे व त्यातील पाणी जाऊ द्यावे. म्हणजे भाजीत घातल्यावर फुटणार नाही.
२) मसाला बनवण्यासाठी दालचिनी, काळीमिरी, लवंग, वेलची, धनेपूड, जिरेपूड मिक्सरमध्ये बारीक वाटून पूड करून घ्यावी.
३) हिरव्या मिरच्या, पुदीना पाने, कोथिंबीर आणि थोडे मिठ एकत्र मिक्सरमध्ये वाटून बारीक पेस्ट करावी.
४) नॉनस्टीक पॅनमध्ये तेल घालून त्यात कांदा मध्यम आचेवर परतून घ्यावा. कांदा परतताना त्यात थोडे मिठ घालावे. कांदा थोडा थंड होवू द्यावा व मिक्सरमध्ये बारीक वाटून घ्यावा. उरलेल्या तेलात पनीरचे तुकडे किंचीत फ्राय करून घ्यावे.
५) नॉनस्टीक पॅन बटर घालून त्यात प्रथम आलेलसूण पेस्ट घालून परतावे. त्यावर क्र. २ मध्ये बनवलेला मसाला घालून परतावा. छान वास सुटला कि भोपळी मिरचीचे तुकडे घालावे व ब्रिफली परतावे.
६) नंतर हिरवा मसाला घालून थोडे परतावे. त्यात कांद्याची पेस्ट घालावी. थोडावेळ परतून त्यात १/२ कप पाणी आणि गरजेनुसार मिठ घालावे आणि थोडे शिजू द्यावे. गॅस एकदम मंद करून त्यात परतलेले पनीरचे तुकडे घालावे. दही घालावे व ढवळावे. भाजीच्या कडेने बटरचा तवंग सुटायला लागला कि भाजी झाली असे समजावे.
हि भाजी पोळी तसेच भाताबरोबरही चविष्ट लागते. नक्की ट्राय करून पाहा. पुदीना पनीरचे कॉम्बिनेशन तर मस्तच.
Labels:
Paneer, paneer recipe, indian paneer recipe, paneer hariyali, Paneer curry recipe, hotel style paneer recipe, North indian paneer recipe, Indian paneer, spicy paneer recipe
Labels:
Bhaji,
North Indian,
P - T,
Paneer,
Side Dish
Paneer Hariyali
Paneer hariyali in Marathi
Serves : 2
Ingredients:
¾ cup Fresh Paneer cubes (12-14 medium pieces)
½ cup Green Bell pepper cubes
3 tbsp plain Yogurt
¾ cup Onion, thinly Sliced
1 tbsp Ginger Garlic Paste
2 tbsp Butter
¼ tsp Turmeric Powder
3-4 tbsp Oil
::::For making Masala::::
Cinnamon 1 stick
4 black pepper balls
3 Cloves
3 cardamom pods
1 tsp Coriander Powder
1 tsp Cumin Powder
::::For Green masala::::
4-5 green Chilies
½ cup Mint Leaves
½ cup Cilantro leaves
Method:
1) Put yogurt into a clean cotton cloth and hang for ½ an hour so that excessive water will get removed and when we will add yogurt into curry, it will not curdle because of heat.
2) For making Masala, grind Cinnamon, Cloves, Cardamom pods, Cumin Powder, Coriander Powder in the grinder.
3) For Green Masala, grind Green chilies, Mint leaves, Cilantro leaves and little salt together to fine paste.
4) In a nonstick pan, heat oil and sauté onion until it becomes translucent. Add little salt while sautéing. Once it become translucent remove from pan and let it cool down. Then grind to fine paste. There will be little oil remaining in the pan. Place Paneer pieces on it and fry lightly. Do not fry for longer time; otherwise, it will become brown in color.
5) Heat a nonstick pan; add butter and sauté ginger garlic paste. Turn heat on medium. Add masala, which we have made in Step 2. Sauté for a minute. Put bell pepper cubes and stir-fry briefly.
6) Then add Green Masala and sauté for a minute. Add Onion paste. Sauté and add ½ cup water and salt to taste and let it cook for couple of minutes. Keep heat on low. Add briefly fried Paneer pieces, hung Yogurt and mix gently. Curry will start leaving butter after few minutes. Then remove from heat and our Dish is ready to serve.
Serve hot with chapatti, Roti, Naan, or even with white rice. Combination of Paneer and Mint tastes amazing.
Labels:
Paneer, Paneer Recipe, Indian Paneer Recipe, Paneer Hariyali, paneer curry recipe, hotel style paneer recipe, north Indian paneer recipe, Indian paneer, spicy paneer recipe
Sunday, July 20, 2008
Henna Tattoo - A simple pattern shines with gilding.
Here is a photo of a freehand henna tattoo with just a bit of gilding added to make Saturday a bit more glamorous. If you click the photo, you will be able to see a larger image of the turquoise & green glitter gel added to highlight the henna tattoo.
Gilding paste is made with cosmetic glitters, or cosmetic powders and a stiff hair gel as the carrier for the color. Sometimes fine glitter is hard to come by, but if you have a mortar & pestle, it only takes a few moments to grind economy glitter into a shimmering powder.
I apply the gilding using a clear henna cone. (Cellophane cones hold up very well & enable clients to see just what color they will get.) I have learned to wait until the henna has dried and at least one glaze of lemon sugar has been applied.
For more photos of gilded henna tattoo, visit the Henna Jewels gallery on my site. There are other photos of gilded henna tattoo in this blog.. check the labels to the right of this post for the complete list.
Friday, July 18, 2008
Need Inspiration? Henna Patterns from India!
Pyari Pyari Henna Tattoo Booklet
Here is another of the wonderful little booklets that helped me start to think like a henna artist. Full of 25 different patterns for hands & feet as well as little doodles for fingers and toes, this small booklet is a great addition to your henna library.
This henna pattern booklet measures 4.5" x 6.75" and has a colorful cover, sure to catch the eye of the henna newcomer. The patterns are printed on a soft grey paper that seems recycled, but I can't tell.
This book as well as several others are now for sale at $4.50 each ( free shipping in the USA ). Just click the title of the book to see more choices, or to add ths lovely gem of a pattern book to your collection.
Just want to browse? Stop by Midnight Sun on Saturday and you are welcome to look through these kinds of pattern books. Who knows, you may choose to get an intricate bit of body art for yourself. See you there?
Thursday, July 17, 2008
Gilded Henna Tattoo - The Peacock in Turquoise
I feel very happy with this tattoo design. I used the "sketching" technique I learned from the fabulous video previously posted to draw out the main components for this pattern.
I remembered to outline the primary design as soon as I drew it so that I would not be dazzled by the detail & forget to create the white space in process. You will see that the gilded nicely fills those "white space" areas in this photo.
If you want a closer look, just click the photo for more details. My client was very happy with her pattern, and enjoyed the process of watching the sketched outline be filled in with various traditional henna components.
I started the pattern fartest from the finger tips & worked my way down the hand. If you look, you can see that the paisley, floral component & peacock head stand out in this pattern as they are surrounded by space.
Now.. for all or you experienced artists, I am sure these tips are not news at all. I am however, spatially dyslexic & needed this kind of obvious "how to" to progress in the art form.
Well that's all for now! Namaste.
कोबीची वडी - Kobichi vadi
Kobichi wadi (English version)
साहित्य:
२ कप बारीक चिरलेली कोबी
१ टेस्पून लसूणपेस्ट
२ टिस्पून लाल तिखट
१/२ टिस्पून जिरं
१/२ टिस्पून हळद
२ टेस्पून तांदूळ पिठ
४ टेस्पून ज्वारीचे पिठ
२ टेस्पून बेसन
चवीपुरते मिठ
२ टेस्पून + वड्या शालो फ्राय करण्यासाठी तेल
कृती:
१) एका भांड्यात चिरलेली कोबी घ्यावी त्यात वरील सर्व जिन्नस घालावेत. थोडेसे पाणी घालून घट्टसर मळून घ्यावे. नंतर तेल घालून थोडे मळून घ्यावे.
::::जर कूकर असेल तर::::
२) त्या कूकरच्या आतील डब्याला आतून तेल लावून घ्यावे व मळलेले पिठ त्यात घालावे व हाताने दाबून सपाट करावे. या डब्यावर झाकण ठेवावे आणि कूकर बंद करून वड्यांचे पिठ शिजवून घ्यावे.
३) वड्यांचे शिजवलेले पिठ थंड झाले कि त्याच्या वड्या पाडाव्यात. आवडीनुसार शालो फ्राय किंवा डिप फ्राय कराव्यात.
::::जर कूकर नसेल तर:::: (Images)
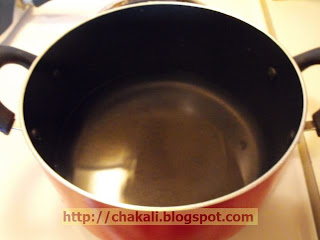
४) मोठे पातेले घ्यावे त्यात १ ते २ लिटर पाणी गरम करत ठेवावे. एका स्टिलच्या भांड्याला आतून तेल लावून घ्यावे. मळलेल्या पिठाचे २ ते ३ उंडे (रोल) करावेत व भांड्यात किंचीत अंतराने ठेवावे.
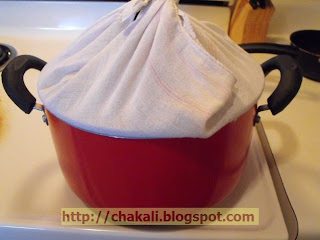
५) वरून झाकण ठेवावे. झाकणाला पंचा किंवा सुती कपडा बांधावा ज्यामुळे वाफेचे पाणी पिठात पडणार नाही. मोठ्या आचेवर १२-१५ मिनीटे वाफवावे. गॅस बंद करावा. ८-१० मिनीटांनी झाकण उघडून उंडे बाहेर काढावे. वड्या पाडून आवडीनुसार शालो फ्राय किंवा डिप फ्राय कराव्यात.
Labels:
Cabbage Pakoda, Kobi vadi, Kobichi wadi, gobhi pakora,kobiche wade, kobichya vadha, maharashtrian cabbage recipes
Labels:
Appetizers,
Cabbage,
Fried,
K - O,
Vade/Bhaji
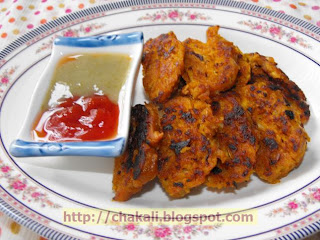
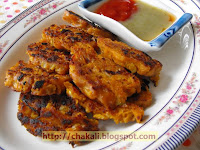
Cabbage Wadi - Pakoda
Cabbage Vadi
Ingredients:
2 Cups finely chopped Cabbage (Do not grate)
2-3 cloves Garlic
2 tsp Red chili Powder
1/2 tsp Cumin seeds
1/4 tsp Turmeric Powder
1/2 tsp Garam Masala
2 tbsp Rice Flour
4 tbsp Jowar Flour (You can use flour like besan, wheat flour)
2 tbsp besan
Salt to taste
Very little water to knead
2 tbsp oil
Method:
1) Mix all ingredients given above. Add very little water to knead.
2) You can use pressure cooker for steaming the dough.
Grease the container inside pressure cooker with little oil. put the dough in it. Gently press and spread the dough in that container. Make the surface flat with fingers. Close the lid. Remove the whistle and steam cook for approx. 10 minutes.
However, there is another method to steam the dough - (Images)
Heat around 2-3 liter water in a deep and big saucepan. Put another steel container inside (first grease this container from inside with little oil). Make 2-3 big rolls of the dough. Put them in the container. Now take a cotton cloth and cover the lid with this cloth (this will help to prevent steam water dripping on the dough rolls)
Steam rolls on medium high for about 13-15 minutes.
3) Turn off heat and let the dough cool down. Once it becomes cool, cut into pieces. Shallow or deep-fry Cabbage Vadis
Labels:
Cabbage Pakoda, Kobi vadi, Kobichi wadi, gobhi pakora,kobiche wade, kobichya vadha, maharashtrian cabbage recipes
Cabbage Wadi (Pakoda) Images
Step by step Images For steam Cabbage Vadi dough
First step is to Heat Water in a big and Deep pan
Second Step is to Put the dough rolls in greased Steel container
And the Third Step is to wrap the lid with Cotton Cloth, cover Pan and steam dough on Medium High heat.
Shallow Fried Cabbage Vadi
Search Labels
Cabbage Pakoda, Kobi vadi, Kobichi wadi, gobhi pakora,kobiche wade, kobichya vadha, maharashtrian cabbage recipes
Wednesday, July 16, 2008
2008 Jamila Henna • Finished Color on Back of Hand
Here is a photo of the results of Jamila Henna 36 hours after the paste was removed. I feel good this wonderful dark reddish brown stain.
Please bear in mind that this is a photo of finished henna on 52 year old skin... and henna on the hand of a skinny woman at that! I am sure lovely, young skin will give a much better finished color than this. For those who are new to henna tattoo, here are a few tips you might want to know if you want to get good rich color for your finished tattoo.
First, the warmer you are, the more your pores open and the deeper the henna can penetrate the skin, so summer weather is good for henna.
Second, henna works best when the paste reamains wet. To keep your paste from drying too quickly, you can either continue to apply lemon sugar to your tattoo to keep the paste active as long as possible.. or you can have the pattern "wrapped" to go.
Third, the longer the paste stays on the skin, the darker the finished color.
Finally, if you moisturize the design area with olive oil, or another vegetable oil, you will get a darker tattoo than those who do not moisturize.
Some clients blow dry their finished tattoos after the paste is removed to help get a darker stain. ( Many people report good results with this method.)
I will publish fotos of the 2008 crop on the palm asap! So.. subscribe to my blog, or just come back for a visit later.
Namaste!
Tuesday, July 15, 2008
फराळी मिसळ - Farali Misal
Farali Misal (English Version) (स्टेप बाय स्टेप इमेजेससाठी इथे क्लिक करा)
वाढणी : ३-४ प्लेट
साहित्य:
::::शेंगदाण्याच्या उसळीसाठी::::
३/४ कप शेंगदाणे
१ टिस्पून तूप
१/२ टिस्पून जिरे
४ टेस्पून शेंगदाण्याचा कूट
१/२ कप पाणी
२ आमसुलं
२-३ हिरव्या मिरच्या
१ टिस्पून गूळ
चवीपुरते मिठ
::::बटाट्याची भाजी::::
२ कप शिजलेल्या बटाट्याच्या फोडी
१ टिस्पून साजूक तूप
१/२ टिस्पून जिरे
३-४ हिरव्या मिरच्या
२ टेस्पून शेंगदाण्याचा कूट
१ टिस्पून लिंबाचा रस
१/२ ते १ टिस्पून साखर
चवीपुरते मिठ
::::साबुदाण्याची खिचडी::::
३/४ कप साबुदाणा
२ टिस्पून तूप
१/२ टिस्पून जिरे
३-४ हिरव्या मिरच्या
२ टेस्पून ओला नारळ
दिड ते २ टेस्पून शेंगदाण्याचा कूट
चवीपुरती साखर आणि मिठ
१ टिस्पून लिंबाचा रस
इतर साहित्य:
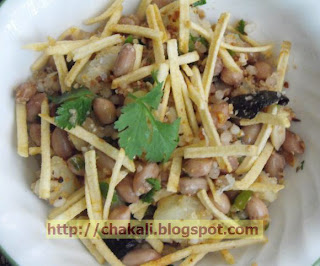
बटाटा सळी
चिरलेली कोथिंबीर
मिरचीचा ठेचा (मिरची + मिठ + थोडीशी जिरेपूड)
दही
कृती:
१) सर्वप्रथम शेंगदाणे ७-८ तास पाण्यात भिजत घालावेत. मिठ घालून कूकरमध्ये शिजवावेत.
२) साबुदाणे ४-५ तास भिजवावेत. उरलेले पाणी काढून टाकावे व साबुदाणे झाकून ठेवावे.
३) बटाट्याची भाजी - इथे क्लिक करा
४) शेंगदाण्याची उसळ - इथे क्लिक करा
बटाट्याची भाजी आणि शेंगदाण्याची उसळ आधी करून ठेवली तरी चालते, पण साबुदाणा खिचडी आयत्यावेळी करावी कारण साबुदाण्याची खिचडी थंड झाली कि तिची चव उतरते.
५) साबुदाणा खिचडी -
भिजवलेल्या साबुदाण्याला साखर आणि मिठ अगोदरच लावून घ्यावे. कढईत तूप गरम करून त्यात जिरे आणि चिरलेल्या मिरच्या घालाव्यात. साबुदाणे घालून परतावे. नंतर नारळ आणि शेंगदाण्याचा कूट घालून परतावे. १ वाफ काढावी. लिंबाचा रस घालून ढवळावे.
मिसळ करताना सर्व पदार्थ गरम करावेत.
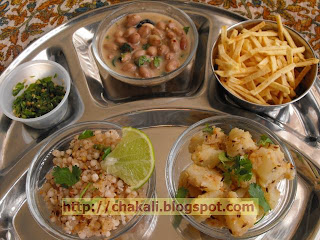
प्लेट किंवा बोलमध्ये आधी १ डाव बटाट्याची भाजी, खिचडी आणि मग दाण्याची उसळ अशा क्रमाने वाढावे. लिंबू पिळावे. त्यावर बटाटा सळी घालावी कोथिंबीर घालून सर्व्ह करावे. तसेच सर्व्ह करताना बाजूला दही वाढावे.
जर तिखटपणा हवा असेल तर मिरचीचा ठेचा घालावा.
टीप:
१) जर बटाटा सळी नसेल किंवा त्याऐवजी दुसरे काही वापरायचे असेल तर घरगुती बटाट्याचा चिवडा वापरावा. तसेच बटाटा चिवडा विकतही आणू शकतो.
२) या मिसळीत बरेच वेरिएशन्स करता येतात. जसे बटाट्याच्या भाजीसारखीच सुरण-भोपळ्याची भाजी करता येते. तसेच खमंग काकडीही बनवून मिसळीत घालू शकतो.
Labels:
Maharashtrian Recipe, marathi recipe, fasting food, upvas recipe, Potato recipe, Indian food recipe
Farali Misal
Farali Misal (Click here for step by step images)
Farali Misal in Marathi
Ingredients:
For Peanuts Curry::
¾ cup Peanuts
1 tsp Ghee
½ tsp Cumin seeds
4 tbsp peanuts powder
½ cup water
2 Kokum
2-3 green Chilies
1 tsp Jaggery
Salt to taste
For Potato Bhaji::
2 cup potato cubes (boiled and peeled)
1 tsp Ghee
½ tsp Cumin seeds
3-4 green Chilies
2 tbsp Peanuts powder
1 tsp Lemon Juice
½ to 1 tsp Sugar
Salt to taste
For Sabudana Khichdi::
¾ cup Sabudana (Sago)
2 tsp Ghee
½ tsp Cumin Seeds
3-4 green Chilies
2 tbsp fresh grated Coconut
1 ½ to 2 tbsp Peanuts powder
Salt and Sugar to taste
1 tsp Lemon juice
Other Ingredients:
Potato Sali
Chopped cilantro for garnishing
Chili Paste (few Chilies + salt + little Cumin Powder)
1 cup Yogurt
Method:
1) Soak ¾ cup Peanuts in water for atleast 7-8 hours. Then add salt and pressure-cook to 3-4 whistles or nice and tender.
2) Wash Sabudana and remove excessive water. Cover the container with any lid. Soak for 4-5 hours.
3) Potato bhaji: Click here
4) Peanuts Curry: Click here
Keep Potato bhaji and peanuts Curry ready. Prepare Sabudana khichdi 5 minutes before serving Misal. Because reheated Sabudana Khichdi doesn’t taste good.
5) Sabudana Khichdi :
Add salt and sugar to soaked Sabudana. Heat 2 tsp Ghee to wok. Put Cumin seeds and chopped green chilies. Add Sabudana and stir well for 2 minutes. Add grated Coconut and Peanut powder and stir well. Cover with lid, let Sabudana cook for 1-2 minutes. Then add lemon juice mix well.
6) Before serving Misal reheat potato bhaji and Peanuts curry.
In a plate put spoonful Potato curry, Khichdi and Peanuts curry. Add little Lemon Juice, little Potato Sali, sprinkle little Cilantro and serve. Serve 1 or 2 spoon plain Yogurt with Misal. Add little chili paste if needed.
Note:
1) If you don’t have Batata Sali, keep ready homemade Potato chiwada. Also, you can use readymade Potato Chiwda.
2) You can make lot of variations. You can make Yam and Pumpkin curry just like Potato bhaji. In that case, do not pressure cook Yam and pumpkin. Peel them, cut into cubes and stir-fry. Also you can serve Khamang Kakdi (Cucumber Salad) as side dish.
Labels:
Indian Fasting Food, Potato Recipe, Vegetarian Recipe, Upvas recipe, Maharashtra Food, Marathi Food recipe
Farali Misal Images
Monday, July 14, 2008
Bridal Henna for Back of Hand - Thanks Toni!
Thanks to all the generous artists who post videos of their work in process! I have learned so much about how to layout the designs as a result of watching their work.
I now use a a much thinner paste than I was using before, and a finer tip on the rolled cone.
I never did like mylar cones, but I found some floral plastic wrap that is comfortable to touch and responds well to pressure. It has a smooth feeling & I am not worried that I will "pop" it.
You may notice that I have a better grasp of the use of white space in this henna tattoo. In part, this is because I remembered to outline components when they were finished.
Of course one of the best blessings to henna tattoo practice is a willing & very still model. The success of this pattern is due in large part to my very patient model. Thanks Toni!
Sunday, July 13, 2008
Arabic Style Henna for the Arm - Chef's Choice Henna
I am always grateful to my trusting henna clients who order "Chef's Choice". I mentioned to Rachel that I was really inspired by the excellent work of the artist who is featured in the henna video below, and that I wanted to practice that more intricate style of henna.
Lucky for me she agreed and here you see the result. This photo shows the henna paste on the skin.. and not black henna. We used the '08 crop of Jamila Henna so I have no doubt the finished color will be excellent! The henna powder created a nice gummy paste when I mixed it. The paste flowed easily and I could "drop lines" of paste on the skin when creating the tattoo, so I really enjoyed that.
I feel so fortunate that highly skilled henna artists are willing to post their work in action. I am a visual learner, and it is so wonderful to watch other artists think.
So.. I went browsing around and found a great live action henna video from Nepal that I will post in the near future. Right now, I am inspired to do a bit more bridal quality henna for practice & will post those photos soon.
Namaste 'til next time.
Saturday, July 12, 2008
Amazing "How To" Bridal Henna Video
This is one of the most useful live demonstrations of How To apply henna. I have learned so much watching this great artist fill hands with mehandi. I hope you enjoy it as much as I do.
Thursday, July 10, 2008
Jamila Henna Powder • Rich Dark Color
Here is a bold pattern for the palm of the hand. This dark color is achieved with the last of the '07 Jamila Henna.
I used lemon juice, henna tea & jamila henna to start the paste.
After about 4 hours I added cajeput, neroli, lavendar and a bit of pomegranate juice to the mixture. I made a fairly liquid paste and used a medium tip mylar cone to achieve this design.
I did wrap the henna in tissue and wear a thin plastic glove overnight to get the darkest color possible. Of course, the color will be even darker tomorrow.. but I had a moment to put this photo up for you today.
I will have new photos online next week showing the finished color achieved with the 2008 harvest of Jamila henna which is just now for sale at Spirit Vision Henna.
The new henna pattern booklets from India are also for sale & make a great gift for the aspiring mehandi artist.
कैरीचे पन्हं - Kairiche Panhe
Panhe (English version)
पन्हे बनविण्याच्या बर्याच पद्धती आहेत. खाली दिलेल्या पद्धतीत पन्ह्याचा तयार गर हा टिकाऊ असतो, ज्यामुळे गर बनवून फ्रिजमध्ये ठेवता येतो आणि गरजेनुसार पन्हे पिता येते.
साहित्य:
दिड कप कैरीचा गर (कृती क्र. १)
२ कप साखर
१ टिस्पून वेलची पूड
चिमूटभर केशर
कृती:
१) साधारण एक मोठी कैरी (साधारण १ ते दिड पौंड) कूकरमध्ये शिजवून घ्यावी. थंड झाली कि साल काढून गर वेगळा काढावा. चाळणीवर हा गर गाळून घ्यावा. चमच्याने घोटून दाटसर गर गाळावा.
२) साखर पातेल्यात घेऊन त्यात साखर बुडेल इतपत पाणी (साधारण १/२ ते पाउण कप)घालून गोळीबंद पाक करावा. पाक तयार झाला कि गॅस बंद करावा. त्यात केशर आणि वेलचीपूड घालावी, कैरीचा गर घालावा. ढवळून घ्यावे. मिश्रण थंड झाले कि काचेच्या बरणीत भरून फ्रिजमध्ये ठेवून द्यावे.
३) एक ग्लासमध्ये २-३ टेस्पून मिश्रण घालावे त्यात थंड पाणी घालून ढवळावे व सर्व्ह करावे.
टीप:
१) सर्व्ह करताना किंचीत मिठ घातले तरी छान चव येते
२) शक्यतो कैरी आंबट असावी. जर कैरी आंबट नसेल तर त्याप्रमाणे साखर कमी करावी. तसेच कमी आंबट कैरीचे पन्हे पिताना थोडे लिंबू पिळावे.
Labels:
Panha, Raw mango drink, indian mango drink, panhe recipe, maharashtrian recipe
Panha - Raw Mango Drink
Raw Mango Drink
Ingredients:
1 ½ cup Raw Mango Pulp (Step 1)
2 cup sugar
1 tsp Cardamom Powder
Pinch of Saffron
Method:
1) Cook 1 big raw Mango (1 to 1 ½ pound) in pressure cooker. Let it cool down. Peel cooked Mango and pulp it. Pour pulp in a strainer and strain it without adding water. Use spoon and give stir, as the pulp is very thick. Some Mangoes have fibrous (Stringy) elements in the pulp. Straining will help to separate those elements and give smooth texture to our Mango drink.
2) In a saucepan, add sugar and very little water to cover the sugar. Make sugar syrup to “soft-ball” (Note 3) stage. Remove from heat. Pour strained Mango pulp in sugar syrup while sugar syrup is hot. Mix well and let it cool down. Once it becomes cool, transfer this mixture to Glass airtight container. Refrigerate to reserve future use.
3) While serving, put 2-3 tbsp mixture in a glass, add cold water and stir well.
Note:
1) Add pinch of salt while serving.
2) Raw Mango should be very tart (sour) in taste. If tartness is less, reduce the amount of sugar. Also, while serving Mango Drink add few drops of lemon juice to taste.
3) That means that when you drop a bit of it into cold water to cool it down, it will form a soft ball. If you remove the ball from water, it will flatten like a pancake after a few moments in your hand.
Labels:
Panha, Raw mango drink, indian mango drink, panhe recipe, maharashtrian recipe
Wednesday, July 9, 2008
My First Award !
I am so glad to receive My First award, "Rocking Girl Blogger" award. and I would like to thank my dear friend Shubha for passing this award to me..
Thanks once again Shubha
I am passing this award to few of my Blogger friends:
Vanamala : Nalapaka
Sunshinemom : Tummytreats
Madhavi : Vegetarian Medley
Congrats and have a nice weekend !
Thanks once again Shubha
I am passing this award to few of my Blogger friends:
Vanamala : Nalapaka
Sunshinemom : Tummytreats
Madhavi : Vegetarian Medley
Congrats and have a nice weekend !
Tuesday, July 8, 2008
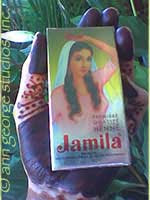
2008 Jamila Henna is HERE!! Great Price & Free Shipping
I just received my case of Jamila Henna! The 2008 Harvest is fresh off the plane & ready to ship. For those of you who like to freeze your henna for later use, now is the time to purchase. I will not put this order in the freezer for at least a week so that you will have time to buy.
Please notice that the sale price of $8.50 per 100 gram box includes free shipping by First Class Mail in the USA. If you are ordering from outside the US, please send a note that includes your ship to address & I will give you the best shipping price possible.
To see un-retouched photos of the deep red color possible with Jamila henna visit the henna powder page at Spirit Vision. PayPal shopping cart buttons are on line. Off we go!
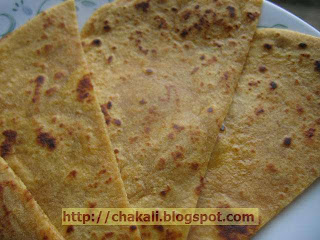
रताळे पोळी - Ratale Poli
Sweet Potato Roti (English Version)
साहित्य:
२ कप रताळ्याच्या फोडी
१ कप किसलेला गूळ
कणिक
२ टेस्पून तेल
तूप
कृती:
१) फोडी कूकरमध्ये वाफवून घ्याव्यात. फोडी कूकरच्या डब्यात ठेवाव्यात, डब्यात पाणी घालू नये. डब्यावर झाकण ठेवावे व फक्त कूकरच्या तळाशी पाणी घालावे. आणि २-३ शिट्ट्या कराव्यात.
२) गरम फोडींमध्ये गूळ घालून चमच्याने ढवळावे. मिश्रण पातळसर झाले कि भिजेल इतकी कणिक त्यात घालावी व तेल लावून मळावे. मध्यम भिजवावे. पिठ २० मिनीटे झाकून ठेवावे.
३) पोळ्या लाटून तूपावर खरपूस भाजून घ्याव्यात.
या पोळ्या ३-४ दिवस छान टिकतात.
टीप:
१) पोळ्या जर जास्त गोड हव्या असतील तर १ कप ऐवजी सव्वा कप गूळ वापरावा.
Labels:
Ratale poli, Sweet Potato recipe, Ratale
Sweet Potato Roti
Ratale Poli
Ingredients:
2 cup Sweet Potato cubes (Peeled)
1 cup grated Jaggery
Whole-wheat flour
2 tbsp oil
Ghee
Method:
1) Add 1 ltr water in pressure cooker. Put sweet Potato cubes in Pressure cooker’s container. Cover the container with any Steel plate as we only want to cook sweet potatoes on steam. Pressure cook sweet Potato cubes to 3 whistles. Let pressure cooker cool down for 10-15 minutes
2) Open the lid of pressure cooker. Add grated jaggery to steamed cubes, and mix well with spoon. Mash all cubes properly. The mixture should be thin in consistency and without any lumps.
3) Add whole-wheat flour to the mixture. Add it spoon by spoon, and make medium consistency dough. Put 2 tbsp oil while kneading. Put this dough in a bowl and cover it for 20 minutes.
4) After 20 minutes divide the dough into 2-inch balls. sprinkle little flour on board. Roll the dough ball with roller pin and make Rotis. Heat a Tawa and place rolled roti on it. Drizzle little ghee and cook both sides.
Serve hot. This Rotis will remain fresh for 3-4 days.
Note:
1) If you want more sweetness to roti, add 1¼ cup Jaggery instead of 1 cup.
Labels:
Ratale poli, sweet potato recipe, ratale
Friday, July 4, 2008
Henna Tattoo Video • Arabic Style How to Henna
Here is the work of a very talented traditional artist. I love her use of bold lines & white space while creating a very full look for the palm of the hand. I just wnat to do more of this kind of art. Don't you want to have some traditional henna ??? I love this pattern. What you you think?
Thursday, July 3, 2008
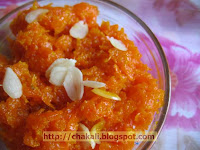
गाजर हलवा - Gajar ka Halwa
Gajar Halwa - Carrot Pudding (English version)
साहित्य:
३ कप गाजर किस
१ कप दूध
१/२ कप साखर
२ टेस्पून साजूक तूप
१/२ टिस्पून वेलचीपूड
बदामाचे काप
कृती:
१) बदाम ३-४ तास पाण्यात भिजवून त्याची साले काढावीत. आणि त्याचे पातळ काप काढावेत. गाजर सोलून किसून घ्यावीत. पातेल्यात २ चमचे तूप गरम करावे. ३ कप गाजराचा किस त्यात घालून २-३ मिनीटे परतावे.
२) २-३ मिनीटांनंतर दूध घालावे. ढवळून मध्यम आचेवर पातेल्यावर झाकण ठेवून शिजू द्यावे. साधारण १० मिनीटे शिजू द्यावे.
३) दुध बर्यापैकी आटले कि त्यात साखर घालावी व ढवळावे. गॅस मोठा ठेवावा आणि आटू द्यावे. वेलचीपूड घालावी. व्यवस्थित आटले कि गॅस बंद करावा.
गाजर हलवा गरम तसेच गारसुद्धा छान लागतो. वेनिला आईसक्रिम आणि गाजर हलवा यांचे कॉम्बिनेशनसुद्धा मस्त लागते.
टीप:
१) जर घरात बदाम उपलब्ध नसतील तर ७-८ शेंगदाणे भिजवून त्याची साले काढून काप करावेत.
Labels:
gajar Halwa, Gajar Halva, Gajaracha Halwa, Carrot Pudding, Corrot Halwa, Carrot Sweet dish, Indian Dessert
Gajar Halwa - Carrot Pudding
Gajar Halwa
Ingredients:
3 cup grated carrots
1 cup Milk
½ cup sugar
2 tbsp Ghee
½ tsp Cardamom Powder
7-8 Almonds
Method:
1) Soak Almonds in water for atleast 4 hours. Peel and slice thinly. Peel Carrots and grate them. Now heat a nonstick pan, add 2 tbsp Ghee. Put grated Carrots and stir for 2-3 minutes.
2) After 2-3 minutes, add milk. Stir on medium heat. Cover pan with lid and let it cook for 10 minutes.
3) Once Mixture becomes thick, add sugar and stir well. On high heat, let the mixture become thick. Add Cardamom powder and keep stirring till the desired constancy.
Gajar halwa can be served hot or at room temperature. Serve Gajar Halwa with Vanilla Icecream. This combination tastes Amazing.
Note:
1) If Almonds are not available, use peanuts.
Labels:
gajar Halwa, Gajar Halva, Gajaracha Halwa, Carrot Pudding, Corrot Halwa, Carrot Sweet dish, Indian Dessert
Tuesday, July 1, 2008
Henna Pattern Booklets from India - Ready to Ship
I have received the balance of my order of henna tattoo pattern booklets from India. Here is one of my favorites: "Latest Mehadi - Arabic Henna Designs Booklet". I have posted a photo of the cover page as well as a sample pattern.
These booklets are for sale at Spirit Vision Henna for $4.50 each with free shipping in the USA. They are printed on a soft grey colored paper,are 31 pages long and at least 25 of them are henna patterns.
The booklet is printed in the language you see on the cover and contains a good balance of bold as well as traditional, or fine line henna tattoo patterns. The cover photo on this booklet alone really helps me introduce new clients to the art of mehndi.
If you click the title of this post, you will go to my website to see other new henna booklets. Secure online shopping provided by PayPal. Please feel welcome to email me any questions you might have. Limited quantities available!!
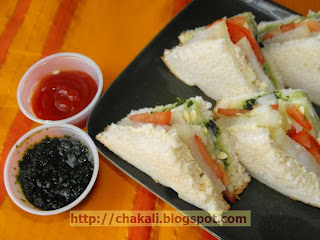
व्हेजिटेबल सॅन्डविच - Veg Sandwich
Vegetable Sandwich (English Version)
वाढणी - १ सॅन्डविच
साहित्य:
२ ब्रेडचे स्लाईस
काकडीचे पातळ काप ६-७
टोमॅटोचे पातळ काप ५
शिजलेल्या बटाट्याचे पातळ गोल काप ४-५
कांद्याची पातळ चकती १-२
१ टेस्पून बटर
चिमूटभर काळे मिठ
:::::हिरवी चटणी::::
दिड कप कोथिंबीर
४-५ हिरव्या मिरच्या
१ टिस्पून जिरपूड
किंचीत साखर
चवीनुसार मिठ
कृती:
१) सर्वात आधी हिरवी चटणी बनवून घ्यावी. दिड कप कोथिंबीर, ४-५ हिरव्या मिरच्या, १ टिस्पून जिरपूड, चवीनुसार मिठ, साखर आणि थोडे पाणी एकत्र करून मिक्सरमध्ये बारीक वाटून चटणी करावी.
२) ब्रेडच्या कडा नको असतील तर काढून टाकाव्यात. दोन्ही ब्रेडच्या एका बाजूला आधी बटर आणि चटणी लावून घ्यावी.
३) एका ब्रेडवर आधी काकडीचे काप पसरून लावावेत. त्यावर टोमॅटोचे काप ठेवावेत. त्यावर काळे मिठ भुरभुरावे. त्यावर बटाट्याच्या चकत्या लावाव्यात, किंचीत मिठ पेरावे आणि त्यावर कांद्याची चकती ठेवावी. बटर आणि चटणी लावलेला ब्रेडचा स्लाईस यावर ठेवावा.
सुरीने तुकडे करावेत. हिरवी चटणी किंवा टोमॅटो सॉसबरोबर सर्व्ह करावे.
Labels:
vegetable sandwich, veg sandwich, quick and easy sandwich, sanwich recipe, sandvich recipe
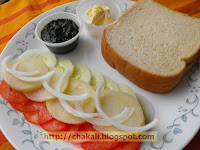
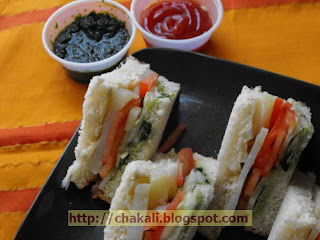
Vegetable Sandwich
Vegetable sandwich
Serving: 1 Sandwich
Ingredients:
2 slice of Bread
6-7 thin slices of peeled Cucumber
5 thin slices of Tomato
4-5 slices of potato (Boiled and peeled)
1-2 slices of onion
1 tbsp Butter
Pinch of Black Salt
::::Green Chutney::::
1½ cup Cilantro
4-5 Green Chilies
1 tsp Cumin Powder
Pinch of Sugar
Salt to taste
Method:
1) To make Green Chutney, grind Cilantro, green Chilies, Cumin Powder, salt, sugar and little water together.
2) Remove edges of bread slices. Spread butter and green chutney on one side of each bread slice.
3) On one bread slice, place Cucumber slices, Tomato slices. Sprinkle black Salt. Place Potato slices and sprinkle little salt. Now place Onion Slice. Put other bread slice over it and press a little.
Cut into Bite size pieces with knife. Serve with Green Chutney and Tomato Sauce.
Labels:
Vegetable Sandwich, veg sandwich, quick and easy sandwich, sandwich recipe, sandvich recipe
Subscribe to:
Posts (Atom)