Wednesday, April 30, 2008
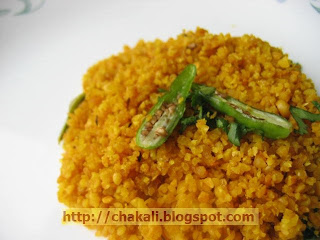
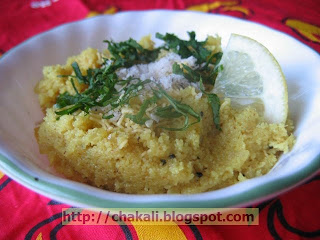
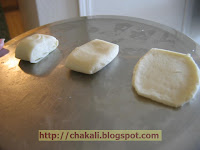
उपवासाचे घावन - Upavasache Ghavan
साहित्य:
१ वाटी वरी तांदूळ
१ वाटी साबुदाणे
२ हिरव्या मिरच्या
२ चमचे नारळाचा चव
२ चमचे दाण्याचे कूट
१ चमचा जिरे
चवीपुरते मिठ
साजूक तूप
कृती:
१) साबुदाणा आणि वरीतांदूळ एकत्र भिजवावे. पाण्याची पातळी साबुदाणा व वरीतांदूळ बुडून वरती २ इंच एवढी असावी. अशाप्रकारे दोन्ही ४-५ तास भिजवावे.
२) दोन्ही व्यवस्थित भिजल्यावर मिक्सरमध्ये वाटून घ्यावे. वाटतानाच त्यात मिरची, जिरे, खोबरे, दाण्याचा कूट, मीठ घालावे. आपण नेहमीच्या घावनाला जेवढे घट्ट भिजवतो तेवढेच घट्ट भिजवावे. म्हणजे त्या अंदाजाने मिक्सरमध्ये पाणी घालावे.
३) नॉनस्टीक तव्याला तूप लावून घ्यावे. एक डाव मिश्रण पातळसर पसरवावे. कडेने एक चमचा तूप सोडावे. एक वाफ काढावी. एक बाजू शिजली कि दुसरी बाजू निट होवू द्यावी.
गरम गरम घावन नारळाच्या चटणी सर्व्ह करावे.
टीप:
१) कधी कधी साबुदाणा चिकट असला तर वाफ काढल्याने घावन गदगदलेले होते आणि घावन कालथ्याने उलथायला सुद्धा त्रास होतो. म्हणून पहिल्या घावनाला वाफ काढून पाहावी. जर घावन चिकट होत असेल तर वाफ न काढता मध्यम आचेवर दोन्ही बाजू निट भाजून घ्याव्यात.
२) घावनात थोडीशी चिरलेली कोथिंबीर सुद्धा छान लागते.
3) मिरची आवडीनुसार कमीजास्त वापरावी.
चकली
Labels:
Fasting Recipes, Sabudana Ghavan, Sago Recipes, Fasting meal, Fasting food. Vari Tandul recipe, sabudana recipe
Upasache Ghavan
Ingredients:
1 cup Vari Tandul (Moraiyo / Samo)
1 cup Sabudana (Sago)
2 green chilies, finely chopped
2 tbsp fresh grated coconut
2 tbsp roasted peanuts powder
½ tsp Cumin seeds
Salt to taste
Pure Ghee
Method:
1) Soak Sabudana and Vari Tandul together in water for around 4-5 hours. Keep water level 2 inch above Sabudana and Vari Tandul.
2) After 4-5 hours, grind sabudana and Vari Tandul by adding little water. Add chilies, cumin seeds, grated coconut, peanuts powder and salt to taste. Consistency of the batter should be medium thick.
3) Grease Non-stick tawa with 1 tsp Ghee. Turn the heat on medium. Pour 1 big spoonful batter and spread it in round shape on tawa just like pancake.
4) Drizzle little Ghee around edges of ghavan. Cover with lid for ½ minute. Let the one side cook. Turn the side, once first side is done properly and let the other side cook.
Note:
1) Ghavan could become mushy and soggy when you steam cook by covering the pan. It generally happens because of sticky sabudana. So try to cook it by covering pan for first ghavan. If it becomes soggy then don’t cover with lid, just cook both sides without covering the pan.
2) You can add chopped cilantro in the batter.
3) Adjust quantity of chilies according to your taste.
Chakali
Labels:
Fasting Recipes, Sabudana Ghavan, sago Recipes, Fasting meal, Fasting Food, varil Tandool recipe, Sabudana Recipe.
Monday, April 28, 2008
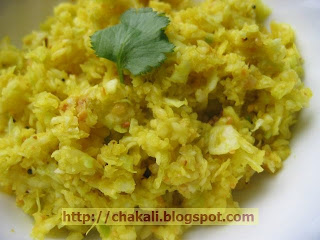
कोबीची पचडी - Kobichi Pachadi
साहित्य:
२ कप किसलेली कोबी
२-३ चमचे शेंगदाणा कूट
२ चमचे तेल
१/२ टिस्पून जिरे
१/४ टिस्पून हिंग
१/४ टिस्पून हळद
२ हिरव्या मिरच्या
१ चमचा लिंबाचा रस
१/२ चमचा साखर
चवीपुरते मिठ
१/४ कप चिरलेली कोथिंबीर
कृती:
१) एका वाडग्यात किसलेली कोबी घ्यावी. लहान कढल्यात २ चमचे तेल गरम करावे. तेलात जिरे, हिंग, हळद आणि मिरचीचे तुकडे फोडणीस घालावे. हि फोडणी किसलेल्या कोबीत घालावी.
२) शेंगदाण्याचा कूट, चवीपुरते मिठ, साखर, लिंबाचा रस आणि चिरलेली कोथिंबीर किसलेल्या कोबीत घालावे व नीट मिक्स करावे.
हि पचडी तोंडीलावणी म्हणून छान लागते तसेच पोळीबरोबरही खायला छान लागते.
चकली
Labels:
kobichi pachadi, cabbage salad, kobi salad, cabbage recipe, kobi recipe, gobhi recipe.
Kobichi Pachadi
Ingredients:
2 cups grated Cabbage
2-3 tbsp Roasted Peanuts coarse Powder
2 tsp Oil
½ tsp Cumin Seeds
¼ tsp Asafoetida
¼ tsp Turmeric Powder
2 Green chilies
½ tsp Lemon Juice
1 tsp Sugar
Salt to taste
¼ cup finely chopped Cilantro
Method:
1) In a mixing bowl, add grated cabbage.
2) In a small saucepan, heat 2 tsp oil. Add ½ tsp Cumin Seeds, ¼ tsp Asafoetida, ¼ tsp Turmeric Powder, 2 Green chilies (chopped). Pour this Tadka to grated cabbage.
3) Then add 2-3 tbsp Roasted Peanuts coarse Powder, ½ tsp Lemon Juice, 1 tsp Sugar, Salt to taste, ¼ cup finely chopped Cilantro. Mix very well.
This pachadi tastes great with chapatti. In addition, you can have it as side dish in your meal.
Chakali
Labels:
kobichi pachadi, cabbage salad, kobi salad, cabbage recipe, kobi recipe, gobhi recipe.
Sunday, April 27, 2008
Simple Henna Design - Gilded Back of Hand Pattern
Here is a henna pattern for the back of the hand. I like it very much because the design moves so gracefully over the hand, is interesting, simple and elegant. Click the title of this post to see more patterns.
This was the first design of the day on Saturday, 4/26 at the Midnight Sun, 1055 Park Street, Five Points, Jacksonville, Florida. We applied a bit of gilding, a spot of deep purple in the center of the flower & the outer drops. There are spots of gold int he pattern as well. I like the soft, elegant look this offers.
I waited until the henna had dried, been lemon sugared three times before adding the gilding. This method seems to work best for the liquidity of the paste I make.
My other "discovery" this year is to use a fine mist sprayer bottle to apply my lemon sugar mix. It's fast, covers all the henna in a spritz or two, doesn't usually run or drip and never disturbs the design.
I now strain fresh squeezed lemon juice three times, add almost equal volume of organic brown sugar, heat this in a little bowl over open flame until the sugar melts, then add a drop of essential oil (usually clove bud) and strain that mixture into the sprayer.
Saturday, April 26, 2008
Bold henna tattoo pattern for the leg
Many people are choosing to have henna tattoo applied to their legs this season. The good news is that both clients featured on the blog still have very good color one week later.
This long lasting color gives us the change to work with shading and reapplication of new henna paste over existing designs.
I hope to be able to post finished color of shaded tattoo in the near future.
I will be offering henna tattoo today, April 26, at Midnight Sun, Park Street, Riverside, Jacksonville, Florida from about 1:00 pm until 5:30.
Please feel welcome to stop by to look at pattern books, or to get a henna tattoo. More information and photos are available by clicking the title of this post.>
Friday, April 25, 2008
वाटली डाळ
साहित्य:
१ वाटी चणाडाळ
फोडणीसाठी: ४ टेस्पून तेल, १/२ टिस्पून मोहोरी, १/२ टिस्पून जिरे, १/२ टिस्पून हिंग, १ टिस्पून हळद, ४-५ कढीपत्त्याची पाने
३-४ हिरव्या मिरच्या
चवीपुरते मीठ
१/२ टिस्पून साखर
१/२ वाटी ओले खोबरे
लिंबाचा रस
कोथिंबीर
कृती:
१) चणा डाळ पाण्यात ३-४ तास भिजवावी. हि चणाडाळ पाणी न घालता भरडसर वाटून घ्यावी.
२) कढईत तेल गरम करावे. हिंग, हळद, मिरचीचे तुकडे, कढीपत्ता घालून फोडणी करावी. वाटलेली चणाडाळ फोडणीस घालावी. चणाडाळ मध्यम आचेवर परतत राहावी. चवीनुसार मिठ, साखर घालावे.
३) चणाडाळीला ३-४ वेळा वाफ काढावी. वाफ काढताना चणाडाळीला पाण्याचा हबका मारावा.
४) चणाडाळ निट शिजली कि थोडे ओलं खोबरं, कोथिंबीर घालावी.
वाढताना लिंबाचा रस घालून ढवळावे.
चकली
Labels:
Chana Dal, Vatali Dal, vatli Chana Dal, Spicy Chana Dal, Instant Chana Dal Recipe, Vatali Dal Recipe.
Vatali Dal
Ingredients:
½ cup Chana Dal
For Tempering: 4 tbsp Oil, ½ tsp Mustrad Seeds, ½ tsp Cumin Seeds, ½ tsp Asafoetida Powder, 1 Tsp Turmeric Powder, 4-5 Curry leaves
3-4 Green Chilies
½ tsp Sugar
¼ cup fresh Grated Coconut
1 tbsp Lemon Juice
Chopped cilantro
Salt to taste
Method:
1) Soak Chana dal in water for 3-4 hours. After 3-4 hours, drain all the water and grind coarsely without adding water.
2) In a wok, heat 3-4 tbsp oil. Temper with, ½ tsp Mustard Seeds, ½ tsp Cumin Seeds, ½ tsp Asafoetida Powder, 1 Tsp Turmeric Powder, 4-5 Curry leaves, chopped Chilies. Stir for few seconds.
3) Then add coarsely ground chana dal. On medium heat, sauté chana dal. Add salt and sugar as per taste. Keep the heat on medium low
4) sprinkle 2 tbsp water all over chana dal, sauté and cover pan with lid. Repeat this for 3 to 4 times or till chana dal gets cooked.
5) Once chana dal cooked properly, then add grated coconut and chopped cilantro. Add Lemon juice. serve hot.
Chakali
Labels:
Chana Dal, Vatali Dal, vatli Chana Dal, Spicy Chana Dal, Instant Chana Dal Recipe, Vatali Dal Recipe.
Wednesday, April 23, 2008
Henna Pattern for the Leg - with Gekko
This photo shows how well henna can work with an existing tattoo. Do you see the gekko? If not, click the photo to enlarge the view.
This design is based on the new bold style of henna pattern made popular by great artists whose patterns are online at Tap Dancing Lizard, although I did not use any particular pattern for this henna tattoo.
The color developed over several days, and by Tuesday, my client had a very rich auburn color. My challenge is to get good photos of the finished color, so stay tuned.
सांज्याच्या पोळ्या - Sanjyachya Polya
साहित्य:
सारणासाठी:
२/३ कप बारीक रवा (१ भाग रवा)
३-४ चमचे तूप
दिड कप किसलेला गूळ (२ भाग किसलेला गूळ)
पावणेदोन कप पाणी (अडीच भाग पाणी)
२/३ कप दूध (१ भाग दूध)
वेलची पूड
पोळीसाठी:
२/३ कप मैदा
१/४ कप कणिक
४ चमचे तेल
कृती:
१) सर्वात आधी सारण करून घ्यावे.
२/३ कप रवा मध्यम आचेवर खमंग भाजून घ्यावा. रवा भाजताना दुसर्या गॅसवर पाउणेदोन कप पाणी गरम करावे. रवा निट भाजला गेला कि गरम पाणी घालून ढवळावे आणि वाफ काढावी. पाणी आळत आले कि लगेच गूळ घालावा. गूळ वितळला कि त्यात गरम दूध घालाव, वेलचीपूड घालावी व मध्यम आचेवर वाफ काढावी. रवा जर चांगल्याप्रकारे भाजला असेल तर रवा, दूध आणि पाणी दोन्ही व्यवस्थित शोषून घेतो. त्यामुळे रवा व्यवस्थित भाजला जाईल याची काळजी घ्यावी.
२) हे सारण गार होत आले कि हाताने मळून घ्यावे. आणि दोन ते अडीच इंच आकाराचे गोळे करावे.
३) मैदा व कणिक एकत्र करून घ्यावे. त्याला ३-४ चमचे कडकडीत तेलाचे मोहन घालावे. आणि मध्यमसर किंवा किंचीत पातळसर भिजवावे. (पुरणपोळीला पिठ भिजवतो त्यापेक्षा घट्ट असावे.)
४) भिजवलेल्या पिठाचे १ इंचाचे गोळे करावेत. याची बोटांनी २ इंचाची पारी करून घ्यायची (मोदकाला करतो तशी). त्याच्या मध्यावर तयार केलेल्या सांज्याचा एक गोळा ठेवावा. आणि पारीच्या सर्व बाजू बंद करून सारण आत भरावे. थोडे गव्हाचे पिठ लावून पोळ्या लाटाव्यात. आणि तव्यावर भाजाव्यात.
भाजताना थोडे तूप घातले तर छान खरपूस लागते.
Labels: Sanjyachya Polya, Sanjachya Polya, Sanjyachi poli, Sweet chapati, Semolina Chapati, Sweet Semolina Chapati
Sanjyachya Polya
Ingredients:
For stuffing
2/3 cup fine Semolina
3-4 tsp Ghee
1½ cup grated Jaggery
1¾ cup Water
2/3 cup Milk
1 tsp Cardamom Powder
For Cover
2/3 cup Maida (Plain Flour)
¼ cup Whole wheat flour
4 tsp Oil
Method:
1) On medium heat, roast 2/3 cup Semolina till golden brown. While roasting semolina, boil 1¾ cup water on other stove top. Once semolina is done, pour boiled water into semolina and stir. Cover with lid and let it cook for couple of minutes or till the water gets absorbed in semolina.
2) Then add grated jaggery. Stir well as it starts melting. Boil 2/3 cup milk in other saucepan and add it to semolina. Add cardamom powder and stir nicely. Cover the pan with lid. It will take few minutes to absorb all the milk in semolina. Stir in between.
3) Once the semolina stuffing becomes Luke warm, knead gently with hand. And make 2 inches round balls.
4) Now we will make dough for the cover. Sift maida and wheat flour together. Heat 3-4 tsp oil to high temperature. Pour this oil into sifted flours. Add water and knead dough to medium consistency. Make 1 inch balls of this dough.
5) Take one dough ball and make pari just like we make for modak or just roll it to 2 to 3 inch puri. Put one stuffing ball on it, close all the edges and cover stuffing ball with the maida dough.
6) Dust this ball with some wheat flour, and roll it gently with rolling pin. Make a thin roti.
7) Heat non stick tawa, place the roti on it and cook till it become golden brown. Now turn the side and let the other side cook till golden brown.
Pour some ghee around the roti while cooking. It will give nice buttery flavor to sanjyachi poli (Roti).
serve hot with Fresh Coconut Milk.
Labels:
Sanjyachya Polya, Sanjachya Polya, Sanjyachi poli, Sweet chapati, Semolina Chapati, Sweet Semolina Chapati
Monday, April 21, 2008
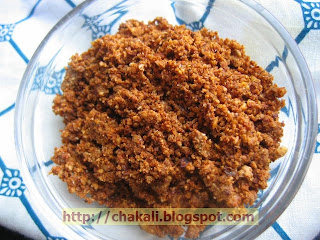
शेंगदाणा सुकी चटणी - Shengdanyachi Chutney
साहित्य:
१/२ कप शेंगदाणे (भाजून सालासकट)
१/३ कप भाजलेले तिळ
१/४ कप भाजलेला खोबर्याचा किस
१ चमचा आमचूर पावडर
५-६ लाल सुक्या मिरच्या
१ चमचा तेल
चवीपुरते मिठ
कृती:
१) शेंगदाणे खमंग भाजावेत. भाजलेल्या शेंगदाण्याच्या सालांचा एक छान स्वाद असतो. जर नको असेल तर साले काढून टाकावीत.
२) १/३ कप भाजलेले तिळ घ्यावे.
३) सुक्या मिरच्या तोडून घ्याव्यात जर तिखटपणा कमी हवा असेल तर त्यातील बिया काढून टाकाव्यात. १ चमचा तेलावर त्या थोड्या भाजून घ्याव्यात.
४) खोबर्याचा किस भाजून घ्यावा त्यातील १/४ कप किस घ्यावा.
५) सर्व जिन्नस वरील प्रमाणात एकत्र करून मिक्सरवर बारीक वाटून चटणी बनवावी.
Labels:
Shengadana Chutney, shengdana chatani, recipe of shengdana chutney, peanut chutney, spicy peanuts chutney, chatani, chutney recipe
Shengdana Chutney - Peanuts Chutney
Ingredients:
½ cup roasted peanuts
1/3 cup roasted sesame seeds
¼ cup grated dry coconut (roasted)
1 tbsp Amchoor powder (Dry mango Powder)
5-6 Dry red chilies
1 tbsp vegetable oil
Salt to taste
Method:
1) Roast peanuts. Roasted Peanuts peels have nice smoky flavor. If you don’t like it remove peels.
2) Brake dry red chilies. If you want to remove the heat of chilies, deseed chilies. Fry them on 1tbsp oil.
3) To make chutney, grind together roasted peanuts, roasted sesame seeds, grated and roasted dry coconut, Amchoor powder, dry red chilies and salt.
Labels:
Shengadana chutney, peanuts chutney, spicy peanuts chutney, sengdana chutney, chutney recipe, dry chutney recipe
Friday, April 18, 2008
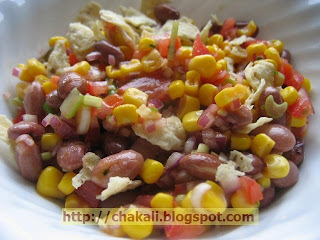
मेक्सिकन सलाड - mexican salad
वाढणी: साधारण दिड कप
साहित्य:
१/२ कप उकडलेले मक्याचे दाणे
१/२ कप उकडलेला राजमा/ रेड बिन्स
१/४ कप बारीक चिरलेला कांदा
१/२ कप चिरलेला पाती कांदा (पातीसह)
१/४ कप बारीक चिरलेला टोमॅटो
१ बारीक चिरलेली मिरची
२ चमचे ग्रिन चिली सॉस/ हॉट पेपर सॉस
२ चमचे टोमॅटो केचप
२ चमचे लिंबाचा रस
चवीपुरते मिठ
मूठभर टॉर्टिया चिप्सचे तुकडे (ऑप्शनल)
कृती:
१) मक्याचे दाणे, राजमाचे दाणे, कांदा, टोमॅटो एका बोलमध्ये एकत्र करून हलक्या हाताने मिक्स करावे.
२) ड्रेसिंगसाठी चिली सॉस/ हॉट पेपर सॉस, टोमॅटो केचप, लिंबाचा रस, बारीक चिरलेली मिरची आणि मिठ एका छोटया वाटीत एकत्र करावे
३) सर्व्ह करायच्या आधी चमच्याने हे ड्रेसिंग तयार सलाडवर घालून चांगले मिक्स करावे.
४) वरती मूठभर टॉर्टिया चिप्सचे तुकडे घालावे आणि सर्व्ह करावे.
Labels:
Mexican salad, Simple Mexican Salad recipe, Vegetarian Mexican Salad, bean and corn salad, salad with pepper sauce, rajma salad.
Mexican salad
Beans and corn salad, with Mexican hot pepper sauce and topped with tortilla chips.
Ingredients:
½ cup boiled sweet corn kernels:
½ cup boiled red kidney beans (rajma)
¼ cups finely cut onion
¼ cup sliced green onions, including some green
¼ cup finely chopped tomato
1 chopped green chili
2 tsp Green Chilli sauce / Hot pepper Sauce
2 tsp Tomato ketchup
2 tbsp Lemon juice
Salt to taste
Crushed tortilla chips, a handful (optional)
Method:
1) Place the corn, kidney beans, onion and tomato in a bowl. Toss lightly to mix.
2) For the dressing, mix together the Chili sauce or Hot pepper Sauce, tomato ketchup, lemon juice, chopped green chili and salt in a small bowl.
3) Just before serving, spoon the dressing over the salad. Mix well.
4) Serve sprinkled with crushed tortilla chips. (This is optional)
Labels
Mexican salad, Simple Mexican Salad recipe, Vegetarian Mexican Salad, bean and corn salad, salad with pepper sauce, rajma salad
Wednesday, April 16, 2008
तिखट मिठाचा सांजा - Tikhat Mthacha Sanja
वेळ: ३० मिनीटे
वाढणी: २ ते ३
साहित्य:
१ वाटी रवा
अडीच ते तीन वाटी पाणी
१ कांदा
२-३ मिरच्या
४ कढीपत्त्याची पाने
फोडणीसाठी : ३-४ चमचे तेल, मोहोरी, हिंग, हळद
चवीपुरते मीठ
१/२ चमचा साखर
लिंबाचा रस
सजावटीसाठी चिरलेली कोथिंबीर, खोवलेला नारळ
थोडी शेव (ऑप्शनल)
कृती:
१) रवा चांगला भाजून घ्यावा. एका कढईत ३-४ चमचे तेल तापवावे. मोहोरी, हिंग, हळद कढीपत्ता, मिरचीचे तुकडे घालून फोडणी करावी. त्यात चिरलेला कांदा घालावा. १ लहान चमचा मिठ घालावे. कांदा शिजू द्यावा.
२) कांदा निट शिजला कि त्यात रवा घालावा. दुसर्या गॅसवर पाणी तापत ठेवावे. रवा थोडावेळ कांद्याबरोबर परतावा. पाणी उकळले कि भाजलेल्या रव्यात ओतावे. निट मिक्स करावे त्यात साखर आणि आवश्यकतेनुसार मीठ घालावे. वाफ काढावी.
३) सर्व्ह करताना शेव, खोवलेला नारळ, कोथिंबीर आणि लिंबाचा रस घालावे.
टीप:
१) रवा निट भाजला आणि मऊसर सांजा हवा असेल, तर ३ वाट्या पाणी सहज लागते. पण जर थोडा फडफडीत सांजा पाहिजे असेल तर त्यात अडीच वाट्या पाणी घालावे.
२) आवडीनुसार सांज्यात काजू, बारीक चिरलेला टोमॅटो, मटार घालू शकतो.
Labels:
breakfast recipe, maharashtrian breakfast recipe, sanja recipe, vegetarian recipe, Maharashtrian recipe, semolina recipe, Pivla sheera recipe, tikhat mithacha shira recipe, tikhamithacha sanja
Tikhat Sheera
Servings: 2 to 3
Time: 30 minutes
Ingredients:
½ cup Semolina
1 ¼ to 1 ½ cup water
1 medium Onion
2-3 green chilies
4-5 curry leaves
For tempering: 3 tbsp oil, ½ tsp mustard seeds, ½ tsp asafoetida, 1 tsp turmeric powder
Salt to taste
½ tbsp sugar
Lemon juice
For garnishing: finely chopped cilantro, grated coconut
Yellow sev (Optional)
Method:
1) Roast semolina till light brown color. In a wok or any nonstick pan, heat 3 tbsp oil. Temper with mustard seeds, asafoetida, turmeric powder, curry leaves and chopped chilies. Stir well and add chopped onion. Add 1 tsp salt. Give a nice stir. Cover the pan and let the onion cook.
2) Once the onion is done, add roasted semolina and turn the heat on medium. Keep stirring semolina. While stirring semolina, boil 1¼ to 1½ cup water on the other stove top. Add boiled water to semolina. Add sugar. Turn the heat on medium. Stir it well. Cover the pan with lid and let the semolina cook for 5-6 minutes. We have already added salt while cooking onion so add little salt if needed.
3) Once the sanja is done, garnish with sev, coconut, cilantro and lime juice. Serve hot.
Tips:
1) Use 2 ½ cups water for 1 cup semolina.
If you like very moist and soft sanja use the following measurement
For 1 cup semolina – 3 cups of water
2) The above recipe is plain version of saanja. But you can add cashew nuts, green peas, chopped tomatoes to enhance the taste.
Labels:
Breakfast recipe, maharashtrian breakfast recipe, sanja recipe, Maharashtrian recipe, semolina recipe, Pivla sheera recipe, tikhat mithacha shira recipe, tikhamithacha sanja, Indian food, pivla shira, sanja
It's 44 degrees on Wednesday Morning!
Oooops! This is not henna weather. Looking ahead on the five day forecast, we are supposed to have warmer temperatures by Saturday. I am hoping so.
I am ready with a heat lamp to make some fresh henna paste for the weekend, but clients always get the best color on their finished hennas when it's HOT outside.
Henna is a heat activated skin dye & the color develops over a 48 hour period. The hotter the skin gets, the darker the stain. Some of last Saturday's clients went home to blow dry their henna tattoos.. and this always helps me get better color as I am cold natured anyway.
Check back for updates on our henna Saturday at The Midnight Sun.
Monday, April 14, 2008
"Chef's Choice" Henna Tattoo
Sometimes, after looking through all the pattern books I bring to Midnight Sun, clients find a style they like, but want a custom tattoo. Hence, the Chef's Choice" option you see to the left.
I am noticing a new style of henna evolving in my work. It seems to be a personalized abstract artwork that I am calling New American Tribal for lack of another name.
The Tribal Tattoo section of my henna site features a photo gallery of more designs in that style if you care to visit.
Weather permitting - in that it is warm and not pouring rain - I will be back at Midnight Sun this coming Saturday. Last Saturday we had a good time, and I was very busy, so I may arrive a bit earlier, perhaps Noon. See you there?
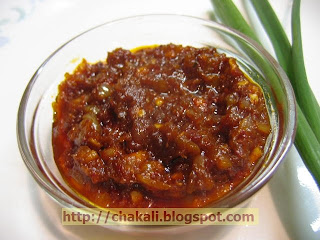
स्प्रिंग रोल डिपींग सॉस - Spring Roll Dipping Sauce
वाढणी: साधारण एक वाटी
साहित्य:
३ चमचे तेल
४ लसणीच्या पाकळ्या
१ लहान चमचा साखर
थोडे पाणी वाटण बनवण्यासाठी
१ लहान चमचा व्हिनेगर
१ चमचा सोयासॉस
१/२ कप टोमॅटो पेस्ट
१/४ कप बारीक चिरलेला कांदा
१/४ कप बारीक चिरलेला पाती कांदा
१ लहान चमचा आले पेस्ट
४-५ लाल सुक्या मिरच्या
चवीपुरते मिठ
फ्रेश मिरपूड
गरजेनुसार लाल तिखट
स्प्रिंग रोलची कृती
कृती:
१) टोमॅटो पेस्ट, लाल मिरच्या, चिरलेल्यातील अर्धा कांदा, आले पेस्ट, लसणीच्या पाकळ्या हे सर्व साहित्य एकत्र करावे. शक्यतो कॅनमधील टोमॅटो पेस्ट किंवा बाजारातील रेडीमेड पेस्ट वापरावी. घरगुती बनवलेल्या पेस्टमुळे डिपींग सॉसला हवा तसा रंग आणि चव येत नाही. हे सर्व साहित्य मिक्सरमध्ये थोडे पाणी घालून बारीक करून घ्यावे. मिश्रण घट्टसरच हवे आहे त्यामुळे अगदी बेताचे पाणी घालावे.
२) कढईत तेल तापवावे, बाकी राहिलेला कांदा आणि पाती कांदा घालावा. आपण हा कांदा शिजवणार नाही आहोत ज्यामुळे सॉसमध्ये कांद्याचा आवश्यक असा करकरीतपणा राहील.
३) लगेच सोयासॉस घाला. त्यावर साखर घालावी. ३-४ सेकंद परतून लगेच तयार लाल पेस्ट घालावी. या पेस्टला तेल सुटेपर्यंत परतावे (साधारण १ ते २ मिनीटे).
४) पेस्टला तेल सुटले कि त्यात व्हिनेगर घालावे आणि गॅस बंद करावा.
५) सॉसची चव बघावी. हा सॉस चांगला झणझणीत आणि तिखट असावा. आवश्यकतेनुसार मिठ, व्हिनेगर आणि लाल तिखट घालावे. थोडी मिरपूड घालावी आणि मिक्स करावे.
Labels:
Spring roll dipping sauce, recipe for dipping sauce, Asian dipping sauce, hot dipping sauce recipe, hot and spicy sauce, homemade dipping sauce
Spring Roll Dipping Sauce
Hot Dipping sauce for Spring Rolls.
I tried a lot to prepare a perfect dipping sauce for sprig rolls, wantons and other Chinese starters. And this combination, accidentally prepared with available ingredients stand out as the best of the lot. You can also use this sauce to cook tasty fried rice. The recipe uses good amount of oil and chilies, so a cup is enough for around 5 people for dipping.
Ingredients:
3 tbsp oil
4 garlic cloves, minced
1 tsp sugar
Water, for mixing and grinding the spices
1 tbsp soy sauce
1 tsp vinegar
1/2 cup Tomato paste
1/4 cup onion finely cut
1/4 cup green onion finely cut
1 tsp garlic paste
4-5 Dry Red Chilies, cut
Salt
Black pepper powder, freshly ground
Red Chili Powder, if required
Method:
1) Mix together tomato paste, Red Chilies, salt, half of the onion, ginger paste, garlic cloves. Use canned or ready made tomato paste, fresh tomatoes will change the dipping sauce taste and color completely. Grind all the above ingredients with little water to prepare red paste.
2) Heat the oil; add remaining half of the onion, green onion quickly. We don’t want to cook onions, as raw-half cooked onions add crunch and texture to the sauce.
3) Add Soy Sauce & Sugar. Stir in quickly and add the prepared red paste.
4) Cook the paste till it leaves oil.
5) Add Vinegar. Turn of the heat.
6) Taste the sauce after some time. It should taste spicy and extreme hot. Adjust salt, vinegar and red Chili powder if required. Add black pepper powder. Mix well.
Labels:
Spring roll dipping sauce, recipe for dipping sauce, Asian dipping sauce, hot dipping sauce recipe, hot and spicy sauce, homemade dipping sauce
Saturday, April 12, 2008
Peacock Arm Tattoo from Midnight Sun
We had a wonderful time at Midnight Sun today.. the first day of "Henna Season" in Five Points. I had to wait for the weather to warm up enough to make good paste. Also, with warm weather, we have some many more places to tattoo.
Peacock designs were very popular today, and here you see a peacock theme on the upper arm. This pattern is a modification of the great art in the henna pattern book "Sangeet" available at Tap Dancing Lizard.
I did several "Chef's Choice" patterns today, and will post some of these "New American Tribal" henna patterns in the next few days.
Lots of new work is ready in photo albums hosted on my updated henna site Spirit Vision Henna.
Friday, April 11, 2008
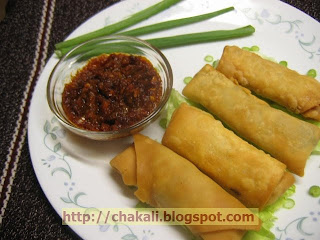
स्प्रिंग रोल - Spring Roll
वाढणी : १२ स्प्रिंग रोल
साहित्य:
कव्हरसाठी:
१/२ कप मैदा
१/२ कप तांदूळ पिठ
१/२ कप कॉंर्न स्टार्च
चवीपुरते मीठ
३ चमचे तेल
सारणासाठी:
१ कप बारीक उभी चिरलेली कोबी
१/२ कप बारीक उभी चिरलेली भोपळी मिरची
२ गाजर किसून
२-३ चमचे पातळ गोल चिरलेली फरसबी
१/२ कप बारीक उभा चिरलेला कांदा
२ पाती कांदा बारीक चिरून
(पाती १ इंच बारीक उभ्या चिराव्यात)
१ ते दिड चमचा सोया सॉस
१/४ चमचे मिरपूड
चवीनुसार मीठ
१/२ चमचे तेल
स्प्रिंग रोल डिपींग सॉसची कृती
कृती:
१) तांदूळपिठ, मैदा, कॉंर्न स्टार्च एकत्र करून त्यात ३-४ चमचे तेल कडकडीत तापवून मोहन घालावे. चवीपुरते मिठ घालावे. पाणी घालून घट्ट मळून घ्यावे. सारण तयार होईस्तोवर झाकून ठेवावे.
२) नॉनस्टीक फ्राईंग पॅनला १/२ चमचा तेल लावून घ्यावे. मोठ्या आचेवर कांदा अगदी २०-२५ सेकंद परतून घ्यावा. कांदा बाजूला काढावा.
३) भोपळी मिरची, कोबी एकत्र करून अर्धकच्च्या परतून घ्याव्यात. परतताना मिठ, सोया सॉस आणि मिरपूड घालावी. भोपळी मिरची व कोबी बाजूला काढून फरसबी, गाजर अर्ध कच्चे परतून घ्यावे. पाती कांदा १०-१५ सेकंद परतून घ्यावा. या सर्व परतलेल्या भाज्या एकत्र मिक्स कराव्यात.
४) भिजवलेल्या पिठाचे लहान गोळे करून पातळसर पोळी लाटून घ्यावी. शक्यतो चौकोनी आकारात लाटावी. जर तसे न जमल्यास मोठा गोल लाटून सुरीने कडा कापून चौकोनी करावा.
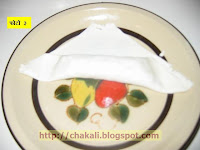
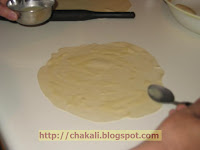
५) फोटो क्र. २ मध्ये दाखवल्याप्रमाणे १-२ चमचे तयार केलेली भाजी आवरणावर ठेवावी.
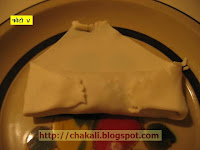
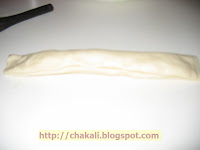
६) फोटो क्र. ३-४ मध्ये दाखवल्याप्रमाणे मुडपावे आणि पुढे गुंडाळून रोल करावा.
पाण्याचे बोट लावून शेवटचे टोक चिकटवावे. आणि मध्यम आचेवर तेलात तळून काढावे. मोठ्या आचेवर तळले तर कव्हर आतल्या बाजूने कच्चे राहू शकते.
Labels:
Spring Roll, Spring Roll recipe, vegetable spring roll, Chinese spring roll, recipe for vegetable spring roll, spring roll wrappers, spring rolls recipe
Spring Roll
Servings : 12 medium Rolls
Ingredients:
Spring roll wrappers:
1/2 cup Maida
1/2 cup Rice Flour
1/2 cup Corn Starch
Salt to taste
3 tbsp Oil
For Filling:
1 cup Shredded Cabbage or Chopped finely lengthwise
1/2 cup Finely Chopped Bell pepper lengthwise
2 Carrots grated
2-3 tbsp thin sliced French beans
1/2 cup finely chopped onion lengthwise
2 strings of Green Onion finely chopped
1 to 1 & half tbsp Soy sauce
1/4 tbsp Fresh ground Black Pepper
Salt to taste
1/2 tbsp Oil
Method:
1) Sift maida, corn starch and rice flour. Heat 3-4 tbsp oil to high temperature and put into sifted flours. Add salt to taste. Knead with the water, and make tight dough. Cover it with lid for half an hour.
2) Grease a non stick pan with 1/2 tbsp oil. Heat the pan on High heat. Add chopped onion, sauté for around 20 seconds and keep aside.
3) Then add chopped bell pepper and chopped cabbage and fry for few seconds or till half cooked. While frying, add salt soy sauce and black pepper. Keep them aside. Then put grated carrot and half cook. Similarly, half cook the green onions. Mix all the half cooked vegetables together.
4) Make 1 and half inch balls out of the dough. Roll it very thin with roller pin. This tortilla should be evenly thin. Cut the edges and make a square.
5) Put 1-2 spoons of filling on the wrapper as shown in photo 2.
6) Fold as shown in photo 3 & 4 and make a roll.
With little water stick the edges. Make all the rolls and deep fry on medium heat. If we fry rolls on high heat it would not be cooked properly from inside.
Very soon I’ll post the recipe for Spring roll dipping.
Labels:
Spring Roll, Spring Roll recipe, vegetable spring roll, Chinese spring roll, recipe for vegetable spring roll, spring roll wrappers, spring rolls recipe
Wednesday, April 9, 2008
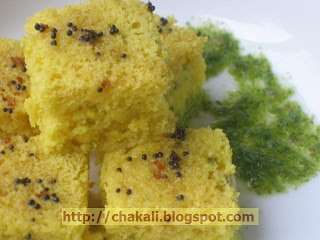
खमण ढोकळा - Khaman Dhokla
वाढणी: साधारण १५ मध्यम तुकडे
वेळ: ३५ ते ४० मिनीटे
साहित्य:
१ कप बेसन पिठ
२ चमचे रवा
१ कप पातळ ताक
२ लहान चमचे साखर
१/२ चमचा मिरची पेस्ट
१/२ चमचा आले पेस्ट
१ लहान चमचा हळद
२ लहान चमचे इनो
१ चमचा लिंबाचा रस
१ चमचा तेल
चवीपुरते मिठ
फोडणीसाठी: १ चमचा तेल, १/२ चमचा मोहोरी, २ हिरव्या मिरच्या बारीक चिरून, १/२ लहान चमचा हिंग
१ चमचा लिंबाचा रस
१ लहान चमचा साखर
२ चमचे पाणी
कृती:
१) १ कप बेसन पिठ, २ चमचे रवा, २ लहान चमचे साखर, १/२ चमचा मिरची पेस्ट, १/२ चमचा आले पेस्ट, १ लहान चमचा हळद, १ चमचा लिंबाचा रस, १ चमचा तेल, चवीपुरते मिठ हे सर्व साहित्य एकत्र करावे. त्यात १ ते सव्वा कप ताक घालावे.
२) वरील मिश्रण तयार झाले कि मिश्रणाचे दोन वेगवेगळे भाग करावे व वेगवेगळ्या भांड्यत ठेवावे.
३) एक मध्यम खोलीचा पसरट फ्राईंग पॅन घ्यावा. त्यात अर्ध्यापेक्षा किंचीत कमी भरेल एवढे पाणी उकळत ठेवावे. त्या पॅनमध्ये राहिल एवढ्या उंचीचे मेटलचे भांडे घ्यावे त्याला तेलाचा हात लावून घ्यावा. फ्राईंग पॅनच्या झाकणाला स्वच्छ पंचा बांधून घ्यावा म्हणजे वाफेचे पाणी ढोकळ्यात न पडता पंच्यात शोषले जाईल.
४) एक भाग मिश्रणात १ टिस्पून इनो घालून पटापट एकाच दिशेने अंदाजे १५-२० सेकंद ढवळावे. मिश्रण थोडे फसफसायला लागते. लगेच मिश्रण तेल लावलेल्या भांड्यात ओतून पाणी उकळत ठेवलेल्या पॅनमध्ये ठेवावे वरून पंचा लावलेले झाकण ठेवावे. मध्यम आचेवर १५ ते १८ मिनीटे वाफ काढावी. वाफ काढताना झाकण अजिबात उचलू नये. यासाठी अंदाज घेऊन आवश्यक तेवढे पाणी ठेवावे. पाणी कमी पडले आणि सर्व पाणी संपले तर ढोकळा भांड्याच्या तळाला चिकटून करपू शकतो.
५) जोवर ढोकळा तयार होतोय तोवर फोडणी तयार करू घ्यावी. लहानश्या कढल्यात किंवा लोखंडी पळीत १-२ चमचे तेल गरम करावे. त्यात मोहोरी, २ बारीक चिरलेल्या हिरव्या मिरच्या, १/२ लहान चमचा हिंग घालून फोडणी तयार करावी. फोडणी किंचीत कोमट होवू द्यावी. एका वाटीत २ चमचे पाणी, १ चमचा लिंबाचा रस, १ लहान चमचा साखर यांचे मिश्रण तयार करावे. हे मिश्रण फोडणीत घालावे.
६) १५ मिनीटांनी गॅस बंद करावा. १-२ मिनीटांनी भांडे बाहेर काढावे. ढोकळा जरा गार झाला कि सुरीने कापून घ्यावा. त्यावर तयार केलेली फोडणी चमच्याने पसरावी.
ढोकळयाच्या मिश्रणाचा उरलेला भागही वरील प्रमाणेच वाफवून घ्यावा.
हा ढोकळा हिरव्या तिखट चटणी बरोबर झकासच लागतो.
टीप:
१) हा ढोकळा कूकरमध्येसुद्धा करू शकतो. फक्त कूकरच्या झाकणाला पंचा बांधून घ्यावा व ते झाकण नुसतेच वर ठेवावे, कूकर बंद करू नये. किंवा कूकरच्या झाकणापेक्षा जाडसर थाळीला पंचा बांधून ती कूकरवर झाकणासारखी ठेवावी.
Labels
Khaman Dhokla, Dhokla recipe, Gujarathi Dhokla, Instant Dhokla recipe, Recipe for Dhokla, Gujarati snacks, Indian Snack, Snacks recipe, Instant snacks recipe
Khaman Dhokla
This is an instant version of famous Gujrathi Khaman Dhokla.
This is a natural tea time snack. Good Dhokla is spongy in texture and bright yellow in color. It has great flavor from oil Tadka, lemon juice and sugar.
Servings: 15 medium pieces
Time: 35 t
Ingredients:
1 cup Chickpea Flour (Besan)
2 tbsp Rawa (Semolina)
1 cup thin buttermilk
2 tsp sugar
½ tbsp Chili Paste
½ tbsp Ginger Paste
1 tsp Turmeric Powder
2 tsp Eno Fruit Salt
1 tbsp Lemon Juice
1 tbsp vegetable oil
Salt to taste
For Tempering:
1 tablespoon oil
½ tsp mustard seeds
2 green chillies, chopped
½ tsp asafoetida (hing)
1 tbsp Lemon juice
1 teaspoons sugar
2 tbsp water
For Garnishing
Chopped coriander
Method:
1) Mix together besan, rawa, salt, 1 tbsp oil, 1 tbsp lemon juice, chili-ginger paste and one cup of buttermilk. Make a batter without lumps.
2) We'll cook the batter in 2 batches so divide batter into two different bowls. 3) For steaming dhokla, well be using 2 vessels - The outer pan/vessel with a lid and inner container for holding the batter. Now boil water in a deep pan (outer container) to produce steam. Grease a metal container (this is an inner container) with oil.
4) Now add 1 tsp Eno to one half of the batter and mix well in one direction. Pour the batter into greased container. Place this container in the boiling water inside the outer one. Take the pan lid and wrap tightly with a clean white cotton cloth. Cover the pan with this lid to trap the steam inside surrounding inner container. This will avoid dripping of water from steam into dhokla. Steam Cook for 18 minutes.
5) After Dhokla is cooked, take out dhokla and cut into cubes. Good Dhokla should be very light, yellow in color and should have fluffy, sponge like texture inside. Repeat the same process for the second half of the batter.
6) Heat remaining oil, add mustard seeds. As mustard starts crackling, add hing and chilies. Turn of the heat. Mix water, sugar and lemon juice together and mix it in Tadka. Mixing lemon water to tadka will help us giving flavor to all the dhokla cubes, as 1tbspoon oil Tadka would not be sufficient.
7) Boil tadka, after adding lemon water and then pour it over Dhokla cubes.
Monday, April 7, 2008
चिरोटे - Chirota
चिरोटे बर्याच प्रकारे बनवले जातात काही जण पाकातले करतात, काहीजण मैद्याचे करतात.
आमच्या घरी ज्या पद्धतीत चिरोटे बनवतात त्याची ही कृती..
वाढणी : साधारण १६ ते १७ चिरोटे
साहित्य:
१ कप मैदा
१/८ कप पातळ केलेले साजूक तूप
१/४ कप दूध
वरून पेरायला पिठी साखर
पेस्ट बनवण्यासाठी ४ चमचे साजूक तूप + ३-४ चमचे तांदूळ पिठ
कृती:
१) मैदा एका भांड्यात घ्यावा त्याला गरम गरम तूपाचे मोहन घालावे. तूप कडक तापवावे, जर मोहनासाठी तूप कमी गरम असेल तर चिरोटे नरम पडतात. दूध घालून मैदा घट्ट भिजवावा. थोडा वेळ झाकून ठेवावे.
२) भिजवलेला मैदा ६ भागात विभागून घ्यावा. त्याचे मध्यम गोळे करून घ्यावे. त्याच्या एकदम पातळ पोळ्या लाटून घ्याव्यात. जितक्या पातळ पोळया तितके चिरोटे हलके होतील आणि चिरोट्यांना छान पदर सुटतील.
३) एक लाटलेली पोळी घ्यावी. त्या पोळीवर पातळ केलेले साजूक तूप आणि तांदूळ पिठ याची दाटसर पेस्ट लावावी. त्यावर दुसरी पोळी ठेवावी परत त्यावर तूप आणि तांदूळ पिठाची पेस्ट लावावी. त्यावर तिसरी पोळी ठेवून परत पेस्ट लावावी.
४) नंतर दोन बाजूंनी गुंडाळी करत मध्यापर्यंत यावे. एका बाजूची गुंडाळी दुसर्या गुंडाळीवर ठेवून थोडे चेपावे. आणि हि तयार गुंडाळी त्यातील तूप सुकेस्तोवर ठेवून द्यावी. अशाच प्रकारे उरलेल्या ३ पोळ्यांची गुंडाळी बनवून घ्यावी.
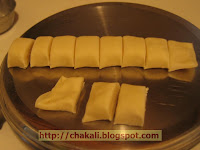
५) या गुंडाळ्यांचे १ इंचाचे तुकडे करून घ्यावे.
६) हे चिरोटे दोन आकारात बनवता येतात.
पहिली पद्धत म्हणजे प्रत्येक तुकडा वरील बाजूने हाताने हलका चेपून त्यावर एकदा उभे आणि एकदा आडवे असे लाटणे फिरवावे.
दुसरी पद्धत म्हणजे गुंडाळीचे तुकडे वरील बाजूने न लाटता जिथून कापले आहे त्या बाजूला हलके दाबून एकदा उभे आणि आडवे असे लाटणे फिरवावे. या चिरोट्यांचा आकार गोल येतो. आणि दिसायलाही आकर्षक दिसतात. पण यामध्ये आत लावलेली तूप आणि तांदूळपिठाची पेस्ट तळताना बाहेर पडते आणि तूप वाया जाते.
७) तळण्यासाठी तेल तापत ठेवावे. तेल गरम झाले कि आच मध्यम करावी. आणि चिरोटे गोल्डन ब्राउन तळून काढावे. पेपरवर काढून लगेच त्यावर २-३ चिमटी पिठीसाखर पेरावी.
टीप:
१)वरील प्रमाणानुसार आपण पिठाच्या एकूण दोन गुंडाळ्या बनवल्या आहेत. तूप आणि तांदूळपिठाची पेस्ट हि प्रत्येक गुंडाळीसाठी वेगवेगळी तयार करावी. कारण तूप घट्ट झाले तर हि पेस्ट पोळीवर पसरवता येत नाही. आणि एकदा तांदूळपिठ घातले कि ते तूप गरमही करता येत नाही.
Labels:
Maharashtrian sweets, Traditional Maharashtrian sweets, chirote recipe, chirota recipe, recipe for chirota, Indian sweets recipe
Chirote
Servings: 16 to 17 pieces
Ingredients:
1 cup Maida
1/8 cup Melted Ghee
¼ cup Milk
½ cup Powdered sugar to sprinkle on chirota
To make Rice flour Paste
4 tbsp Pure Ghee
3 tbsp Rice Flour
Method:
1) In a mixing bowl, add 1 cup Maida. In a small saucepan, heat 1/8 cup Ghee to high temperature. Put ghee in Maida. If the ghee is not hot enough, Chirotas won't get required crunchiness. Add ¼ cup milk and knead well. Cover the dough for half an hour.
2) Divide the dough equally into 6 balls. Roll one ball and make round shaped tortilla / Chapati. This tortilla / Chapati should be very thin. As much thin you will roll the Chapati / tortilla, the chirotas will become more crunchy and light.
3) Chirote has a layered texture. To create these layers, we'll use 3 tortillas/ Chapati at a time. Keep them aside separately. Melt 2 tbsp ghee in a small saucepan, and make a paste by adding 2 tbsp Rice Flour. Take 1 tortilla, spread 1 tbsp rice flour paste all over the upper side. Then place second tortilla over the first tortilla. Spread 1 tbsp rice flour paste all over it. Then place third tortilla and spread the paste over it.
4) Start rolling tightly from two opposite sides. Place one rolled side on the other. Press a little. Wait till the melted ghee inside the roll becomes thick. Repeat the same process for remaining 3 dough balls.
5) Once the ghee is thickened, cut the roll into 1 inch pieces.
6) We can make Chirotas in two shapes
First Method: Take one piece. Keep the plain side upward, just press the piece with your palm and roll the roller without applying too much pressure.
Second Method: Keep the swirled side upward. Press it gently and roll it without applying much pressure. As per this method, the chirota will become round in shape. Chirota looks very attractive by using this method.
7) In a deep fryer, heat enough oil for deep frying. Once the oil is hot turn the heat to medium. Deep fry chirotas until golden brown. Place fried chirotas on paper towel and immediately sprinkle 2-3 pinch of powdered sugar on the surface of each chirota. because of hot chirota, sugar will melt and immediately absorb in it.
Note:
As per above measurement of ingredients we are making total 2 big rolls of the dough. Make Ghee and rice flour paste separately for each roll. That means you have to make it twice. If you make entire paste in one time, ghee could become thick for second roll and you will not able to heat it again as we have already added rice flour to it. And while heating it again the rice flour will get cook in heated ghee.
Labels:
Maharashtrian sweets, Traditional Maharashtrian sweets, chirote recipe, chirota recipe, recipe for chirota, Indian sweets recipe
Friday, April 4, 2008
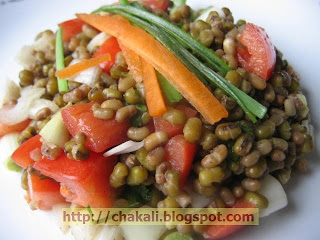
मूग मटकी सलाड - Moog Matki Salad
वाढणी: १ मध्यम बोल
साहित्य:
१/२ कप उकडलेली मटकी
१/२ कप उकडलेले मूग
१/२ मध्यम कांदा, चिरलेला
१ मध्यम टोमॅटो, बिया काढून चिरावा
१ हिरवी मिरची बारीक चिरलेली
१ चमचा लिंबूरस
१ लहान चमचा चाट मसाला
चवीपुरते मिठ
२ चमचे चिरलेली कोथिंबीर
१ पाती कांदयाची काडी
सजावटीसाठी:
१ लहान गाजर
कृती:
१) १/२ कप उकडलेली मटकी आणि १/२ कप उकडलेले मूग बनवण्यासाठी प्रत्येकी १/४ कप मूग आणि मटकी घ्यावी. १०-१२ तास भिजत ठेवावे. मूग मटकी भिजल्यावर त्यातील पाणी काढून टाकावे व मूग मटकीला थोडे मिठ चोळून घ्यावे. प्रेशरकूकरमध्ये पाणी घालावे. मूग आणि मटकी कूकरच्या डब्यात घ्यावी. या डब्यात पाणी घालू नये. फक्त कूकरमध्ये तळाला जे पाणी घालतो त्यावरच मूग मटकी शिजू द्यावी. मूग मटकी खुप जास्त शिजू देवू नये. जर त्या प्रमाणाबाहेर शिजल्या तर सलाडची चव बिघडेल.
२) शिजवलेले मूग मटकी, चिरलेला कांदा, थोडा पाती कांदा, चिरलेला टोमॅटो, मिरची मिक्स करून एका बोल मध्ये ठेवावे. बोलवरती झाकण ठेवून १/२ तास फ्रिजमध्ये ठेवावे.
३) एका वाटीत लिंबूरस, थोडे मिठ, चाट मसाला मिक्स करून ठेवावे. हे मिश्रण सलाड सर्व्ह करायच्या आधी त्यात मिक्स करावे. कोथिंबीर, बारीक केलेले गाजर आणि पाती कांदा याने सजवावे. यावर चवीसाठी थोडी फ्रेश मिरपूड घालावी.
टीप:
१) मूग आणि मटकीला मोड काढून हे सलाड अधिक पौष्टिक बनवू शकतो.
Healthy Salad, Moong salad, Matki salad, moth salad, oilfree recipe, healthy heart, heart healthy diet, moth recipes, matki recipe, low calorie diet, low, calorie recipes, low calorie food, low calorie salad
Boiled Moong Matki Salad
Ingredients:
1/2cup boiled moth bean (matki)
1/2cup boiled green gram (moong)
1/2 medium onion, Chopped
1 medium tomato, (remove seeds) and chopped
1 green chilly, finely chopped
1 tbsp Lemon juice
1 tsp Chaat masala
Salt to taste
2 tsp fresh coriander leaves,Chopped
1 stalk spring onion
1 small carrot for garnishing
Method:
To prepare boiled moong and matki
1) Sort Moong and matki beans and soak them in water pot for 8-10 hrs, separately. Drain the water and
Use pressure cooker to boil them. Do not over boil moong/matki, should not be too soft.
2) Mix the boiled matki and moong, onion,spring onion, tomato and green chillies in a bowl.
3) Cover the bowl and Refrigerate for half-an-hour.
4) For the dressing, mix together the lemon juice, chaat masala and salt. Add the dressing to the chilled salad just before serving.
5) Garnish with coriander leaves, fine carrot and spring onion greens.
6) Use fresh ground peppercorn to taste. Serve.
Labels:
Healthy Salad, Moong salad, Matki salad, moth salad, oilfree recipe, healthy heart, heart healthy diet, moth recipes, matki recipe, low calorie diet, low, calorie recipes, low calorie food, low calorie salad
Tuesday, April 1, 2008
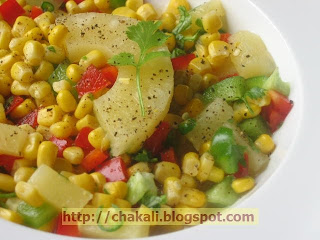
कॉर्न अँड पाइनॅपल सलाड - Corn Pineapple Salad
Colorful and Delicious
मक्याचे हे सलाड चवीला छानच लागते ! आणि अननसाबरोबर याची चव तर अधिकच वाढते. तसेच करायलाही अगदी सोपे आहे. नक्की करून बघा हे सलाड आणि कळवा कसे झाले होते ते !!
वाढणी: साधारण दिड कप
साहित्य:
१ कप स्विट कॉर्न
१/४ कप हिरवी भोपळी मिरची, कॉर्न एवढ्या आकारात चौकोनी चिरलेली
१/४ कप लाल भोपळी मिरची, कॉर्न एवढ्या आकारात चौकोनी चिरलेली
२ अननसाचे काप, चौकोनी चिरलेले
२ हिरव्या मिरच्या
१ चमचा लिंबाचा रस
२ चमचे अननसाचा रस
सजावटीसाठी कोथिंबीर
चवीपुरते मिठ
चवीपुरती मिरपूड
कृती:
१) पटकन सलाड बनवण्यासाठी कॅनमधील स्विट कॉर्न वापरावा. वापरण्यापुर्वी कॉर्न एकदा पाण्याखाली धुवून घ्यावे. जर कणीस आणून त्याचे दाणे वापरणार असाल तर पाण्यात थोडे मिठ घालून दाणे शिजवून घ्यावेत. नंतर त्यातील पाणी काढून थंड होवू द्यावेत.
२) हिरवी आणि लाल भोपळी मिरची कॉर्नच्याच साईजची चिरून घ्यावी.
३) अननसाचे १ इंचाचे तुकडे कापून घ्यावे.
४) हिरवी मिरची, कोथिंबीर चिरून घ्यावी.
५) चिरलेली भोपळी मिरची, अननस, कॉर्न एकत्र करावे त्यात लिंबाचा रस , अननसाचा रस, मिठ, मिरची घालून निट मिक्स करावे.
६) सर्व्ह करायच्या आधी फ़्रेश मिरपूड वरती भुरभुरावी. आणि कोथिंबीरीने सजवावे.
Labels:
Corn Salad, Pineapple Salad, Corn, Pineapple, Salad Recipe, Corn recipes,Heart Healthy Recipe, Diet Food, Diet Recipe, easy recipe, easy salad recipe, Low fat recipe, fat free diet recipe, fat free diet recipe
Corn & Pineapple Salad
Colorful and Delicious!!!
Servings: Approximately 1 & half cup
Ingredients:
1 Cup Whole kernel sweet Corn
1/4 cup green bell pepper, cut into pieces to the same size of corn
1/4 cup red bell pepper, cut into pieces to the same size of corn
2 pineapple slices, cut in chucks of 2 cm cubes
2 Green Chillies
1 tbsp Lemon Juice
2 tbsp Pineapple Juice
Cilantro for Garnishing
Salt to taste
Black Pepper, Fresh ground to taste
Method:
1) Prefer canned sweet corn to make the preparation quick. Wash corn kernels before use.If using natural,uncooked corn,
boil corn in salted water until soft. Drain thoroughly and cool.
2) Cut green bell pepper and red bell pepper into pieces to the same size of corn.
3) Cut 1 and 1/2 pineapple slices into 2cm cubes (bigger than capsicum and corn size)
4) Chop Green Chillies. Clean , wash and chop cilantro.
5) Combine corn, pepper and pineapple. Mix it well with Lemon juice, pineapple juice, salt, chillies.
6) Add fresh ground peppercorn before serving. Garnish with a little bit of cilantro.
Labels:
Corn Salad, Pineapple Salad, Corn, Pineapple, Salad Recipe, Corn recipes,Heart Healthy Recipe, Diet Food, Diet Recipe, easy recipe, easy salad recipe, Low fat recipe, fat free diet recipe, fat free diet recipe.