Tuesday, August 28, 2007

मिक्स बेक्ड वेजिटेबल - Mixed Baked Vegetables

Mix Baked Vegetable in English

mix vegetables, mix veg recipe, baked vegetable, marathi mix bhaji साहित्य:
१ कप शिजलेल्या बटाट्याच्या फोडी
१/२ कप उभा बारीक चिरलेला कांदा
पाव कप गाजराच्या फोडी
पाव कप फरसबी चिरून (१ इंच)
पाउण कप अर्धवट शिजवलेले मटार + मका दाणे
१/२ कप भोपळी मिरची उभी चिरून
२ शिजलेल्या टोमॅटोची प्युरी
(मिक्सरवर प्युरी करताना पाणी घालू नये. प्युरी करताना मिक्सरमध्ये २ लसणीच्या पाकळ्या टाकाव्या)
८-१० काजू बी
३-४ कढीपत्ता पाने
२ लाल सुक्या मिरच्या
१ चमचा गरम मसाला
२ चमचे बटर
मीठ
३ टेस्पून कोथिंबिर
लिंबाचा रस

ओव्हनमध्ये बटाटा, गाजर, चिरलेल्या कांद्यातील थोडा कांदा, फरसबी, सिमला मिरची ३५० F वर १२-१४ मिनिटे बेक करावे. किंवा आपल्या घरातील ओव्हनच्या सेटींग प्रमाणे adjust करून भाज्या गोल्डन ब्राउन होवू द्याव्यात. त्यामुळे भाजीला छानसा स्वाद येतो.

कृती:
१) नॉनस्टीक फ्राईंग पॅनमध्ये मध्यम आचेवर बटर घालावे. कढीपत्ता, बेक
न केलेला कांदा, काजू बी घालावी. कांदा परतला गेला की लाल मिरचीचे तुकडे, बेक केलेल्या भाज्या घालाव्यात.
२) भाज्यांना थोडी वाफ काढावी. गरम मसाला घालावा. टोमॅटो प्युरी आणि लसूण यांचे मिश्रण घालावे. २-३ मिनीटे वाफ काढावी. त्यात मटार, मका दाणे घालावे. २-३ मिनीटे वाफ काढावी. मिठ घालावे. वरून बारीक चिरलेली कोथिंबीर घालावी. लिंबाचा रस घालावा.गरम गरम भाजी पोळीबरोबर किंवा पावाबरोबर खावी.

Labels:
mix vegetable recipe, baked vegetable recipe, mixed veg recipe, north indian recipe
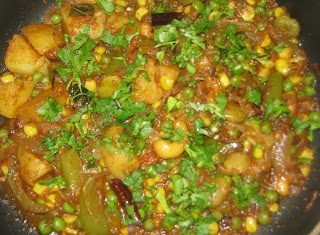
Mix Baked Vegetable

Mix Baked Vegetable in Marathi

Serves: 3 to 4 persons

mix vegetables, mix veg recipe, baked vegetable, marathi mix bhajiIngredients:
1 cup boiled and peeled potato cubes
½ cup thinly sliced Onion
¼ cup Carrot cubes
¼ cup French beans (1 inch pieces)
¾ cup half-cooked Green peas + Corn
½ cup Bell pepper, sliced lengthwise
Tomato Puree of 2 tomatoes
(Boil and peel tomatoes. Do not add water. Add 2 garlic cloves and purée)
8-10 Cashew nuts
3-4 curry leaves
2 dry red Chilies
1 tsp Garam Masala
2 tbsp butter
Salt to taste
3 tbsp chopped Cilantro
1 tsp lemon juice

Bake Potato cubes, Carrot cubes, half of the sliced Onion, French beans, and Bell pepper to 350o F for 13 to 14 minutes or until vegetables become golden brown. Baking gives nice flavor to vegetable.

Method:
1) Heat a nonstick pan over medium heat. Put butter and let it melt. Add Curry leaves, remaining sliced onion and Cashew nuts. Sauté until onion become translucent. Add red Chilies and baked vegetables.
2) Cover pan with lid and let the vegetables cook for couple of minutes over medium to medium low heat. Add Garam masala, Tomato puree and mix well. Cover and cook for 2-3 minutes. Add green Peas and Corn, cover and cook for 2-3 minutes. Add salt and sprinkle chopped cilantro, and lemon juice.
Serve hot with Naan, Roti, Chapati or even with slice bread.

Labels:
Mix baked vegetable, Mix vegetable recipe, North Indian Recipe, mix veg recipe

Sunday, August 26, 2007

भरली मिरची - Bharali Mirchi

Bharali Mirachi

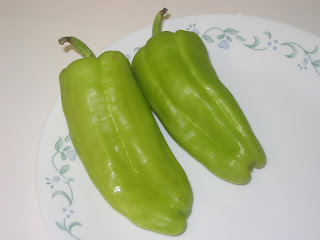
१) लांबट हिरव्या मिरच्या

bharali mirachi, mirachichi bhaji, masala mirachi, stuffed mirachi, stuffed capsicum २) तयार भरली मिरची


साहित्य:
२ लांबट हिरव्या मिरच्या (या मिरच्या कमी तिखट असतात, आणि त्यांची साल जाडसर असते. पण चवीला खुप छान लागतात.)
३ ते ३ १/२ टेस्पून चणा पिठ
१ टेस्पून खवलेला नारळ
१/२ टेस्पून धणेपूड
१ टिस्पून जिरेपूड
१/२ टिस्पून आमचूर पावडर
१/४ टिस्पून हळद
२ टिस्पून लाल तिखट
चिमूटभर हिंग
चवीपुरते मीठ
१/२ टिस्पून साखर
तेल

कृती:
१) खवलेला नारळ सोडून सर्व मसाला एकत्र करावा. फ्राईंग पॅनमध्ये १-२ चमचे तेल गरम करावे. त्यात आधी नारळ आणि नंतर बाकीचा मसाला घालावा. १-२ मिनीटे परतावे. मसाला बाजूला काढून ठेवावा.
२) मिरच्या धुवून पुसून घ्याव्यात. त्यांना उभी चिर द्यावी जेणेकरून त्यात मसाला भरता येईल.
३) मसाला मिरच्यांमध्ये भरावा. मसाला बाहेर पडू नये म्हणून दोर्याने मिरच्या बांधून घ्याव्या.
४) मध्यम आचेवर फ्राईंग पॅनमध्ये १ चमचा तेल गरम करावे. त्यात किंचित लाल तिखट घालावे. ज्यामुळे मिरच्यांच्या बाहेरील बाजूंना फ्लेवर येतो. नंतर भरलेल्या मिरच्या पॅनमध्ये ठेवाव्यात. वरून झाकण लावून वाफ काढावी. २-४ मिनीटांनी मिरचीची बाजू पलटावी.
५) खाताना दोरा काढुन टाकावा.

टीप : आपल्या आवडीनुसार मसाल्यात थोडा गरम मसाला किंवा करी मसाला घालू शकतो.

Labels:
Stuffed Pepper, Stuffed Bell Pepper, North Indian Recipe, Indian Stuffed Mirchi recipe

Saturday, August 25, 2007

How wonderful to Henna Twins!

I had a wonderful time at Midnight Sun today, and met many wonderful people. I wish I could have taken photos of all the henna, but I was busy.. and we are all happy.

I did maange to take this photo of sisters, who were twins and chose similar, almost identical tattoos. Ok. They chose the same basic design, but henna has a way of negotiating with a human canvas. Here are the results.

I will not be working on Saturday, September first, but will be back on the 8th. See you soon.

Thursday, August 23, 2007

मूगाचा डोसा (पेसरट्टू) - Moogacha Dosa

Moogacha Dosa


"पेसरट्टू" म्हणजेच मूगाच्या डाळीचा डोसा. हा डोसा मुख्यतः दक्षिण भारतातील आन्ध्र प्रदेश या राज्यात बनवला जातो. आन्ध्र प्रदेशात पेसळू (Pesalu) म्हणजे हिरवे मूग. सालासकट मूगाची डाळ यासाठी वापरली जाते. नारळाच्या चटणीबरोबर हा डोसा फारच रुचकर लागतो.मी Mints च्या ब्लॉगवरून कृती पाहून हा मुगाचा डोसा ट्राय केला.

चकली

Wednesday, August 22, 2007

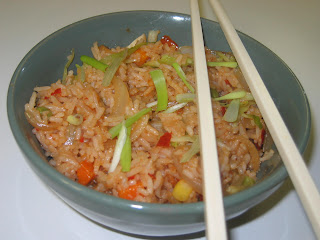
शेजवान फ्राइड राईस - Schezwan Fried Rice

Schezwan Fried Rice in English

Indo Chinese recipe, fried rice recipe, Chinese fried rice recipe, schezwan fried rice recipe, chinese cuisine, indochinese cuisine
साहित्य:
३/४ कप तांदूळ (बासमती किंवा साधा)
पाउण कप कांदा उभा चिरून
४ काड्या पाती कांदा - पाती बारीक चिरून (थोडा पाती कांदा वरून गार्निश करायला बाजूला काढून ठेवावा)
पाउण कप कोबी बारीक उभी चिरून
पाव कप गाजराचे तुकडे
पाव कप फरसबीचे तुकडे (थोडीशी शिजवून घ्यावी)
१ टेस्पून सोयासॉस
दिड टिस्पून व्हिनीगर (आवडीप्रमाणे कमी किंवा जास्त घालावे)
चवीनुसार शेजवान सॉस
१ टेस्पून तेल
चवीनुसार मीठ

शेजवान सॉस कृती

शेजवान सॉस कृती

कृती:
१) भात : तांदुळाच्या अडीचपट ते तीन पाणी घ्यावे, त्यात १/२ टिस्पून तेल आणि पाऊण चमचा मीठ घालून मध्यम आचेवर गरम करत ठेवावे. त्यात तांदूळ घालावे. वरुन झाकण ठेवून तांदूळ शिजू द्यावे. तेलामुळे भात मोकळा होतो. उरलेले पाणी काढून घ्यावे. आणि तयार भात परातीत मोकळा करून गार करत ठेवावा.
२) पाती कांदा सोडून चिरलेल्या भाज्यांना थोडा शेजवान सॉस लावून घ्यावा.
३) नॉनस्टिक फ्राईंग पॅनमध्ये १ टेस्पून तेल गरम करावे. गॅस मध्यम आचेवर ठेवून त्यात भाज्या घालाव्यात. १ ते २ मिनीटे परतावे. अगदी शेवटी पाती कांदा घालावा आणि १५ ते २० सेकंदानी भाज्या काढून घ्याव्यात.
४) तोच फ्राईंग पॅन चांगला तापू द्यावा व त्यात १ चमचा शेजवान सॉस घालून त्यात तयार भात घालावा. मध्यम गॅसवर ठेवूनच चांगला परतावा. त्यात थोडे मीठ घालावे. व्हिनीगर आणि सोयासॉस घालावा.
५) भात कढईत असताना मध्यम आचेवर भातामध्ये परतलेल्या भाज्या घालाव्यात व चांगले मिक्स करावे. २ मिनीटे परतावे. चायनीजच्या गाडीवर तुम्ही बघितलेच असेल. :)

टीप :
१) नॉनस्टिक फ्राईंग पॅनऐवजी लोखंडी कढई असेल तर स्वाद छान येतो. भाज्या आणि भात चांगला परतला जातो.
२) जर लसणीचा फ्लेवर जास्त हवा असेल भाज्या परतायच्या आधी तेलात १/२ चमचा लसूण पेस्ट परतावी आणि मग भाज्या घालाव्या.

Labels:
Indo Chinese Food, Chinese Rice, Fried Rice recipe, Vegetable Fried Rice, Shezwan fried rice

Schezwan Fried Rice

Schezwan Fried Rice in Marathi

Ingredients:
¾ cup white Rice (Basmati or any other long grain)
¾ cup Onion, sliced lengthwise
4 Spring Onion, finely chopped (keep 2 tbsp aside for garnishing)
¾ cup Cabbage, sliced thinly lengthwise
¼ cup Carrot pieces (1 inch)
¼ cup French Beans (half cooked or use frozen)
1 tbsp Soy sauce
1½ tsp Vinegar
Schezwan Sauce as per taste
1 tbsp Oil
Salt to taste


Indo Chinese recipe, fried rice recipe, Chinese fried rice recipe, schezwan fried rice recipe, chinese cuisine, indochinese cuisine
Schezwan Sauce Recipe 1

Schezwan Sauce Recipe 2

Method:
1) Rice: heat a saucepan; add 2 to 2¼ cup water, ½ tsp Oil and 1 tsp salt. Give a nice stir and add ¾ cup Rice. Cover and let Rice cook on medium heat. Once rice is done, drain remaining water. Transfer Rice to a flat plate to cool down.
2) Add all the vegetables in a bowl except Spring Onion. Add Schezwan sauce a mix well.
3) Heat a nonstick pan; add 1 tbsp Oil. Keep the heat on medium. Stir-fry marinated vegetables for 2 minutes. At the end, add spring Onion. Sauté for 15 seconds; and remove pan from heat. Transfer vegetables to a bowl otherwise it could get burn.
4) Heat the same frying pan; add 1 tbsp Schezwan Sauce. Add rice and mix well until Schezwan sauce spread all over the rice. Add salt if needed. Add Vinegar and Soysauce. Toss nicely.
5) Add stir-fried vegetables and mix finely. Fry for 2 minutes over high heat.

Note:
1) If Possible, use Iron Wok instead of nonstick pan as it holds the high heat very well and it gives nice flavor.
2) Schezwan sauce has enough Garlic to give garlic flavor to Schezwan Rice. However, if you want more Garlic Flavor, add 3 to 4 finely chopped Garlic cloves while stir-frying vegetables.

Tuesday, August 21, 2007

शेजवान सॉस - Schezwan Sauce

Schezwan sauce in English

साहित्य:
१० लाल सुकया मिरच्या
१ टेस्पून लसूण एकदम बारीक चिरून
१ टेस्पून आले पेस्ट
१ टेस्पून कांदा (अगदी बारीक चिरलेला) / किंवा पाती कांदा सुद्धा वापरू शकतो.
१/२ टेस्पून कॉर्न फ्लोअर किंवा कॉर्न स्टार्च
१ टेस्पून व्हिनेगर (ब्राऊन किंवा व्हाईट)
साखर आणि मीठ चवीनुसार
३ टेस्पून तेल

कृती :
१)१ कप पाणी चांगले उकळावे. त्यात सुकया मिरच्या तुकडे करून घालाव्यात. ३ ते ४ तासांनी किंवा मिरच्या नरम झाल्यावर त्यातले पाणी कढुन टाकावे. मिरच्यांची मिक्सरवर पेस्ट करावी.
२)तेल गरम करावे. त्यात लसूण, कांदा, आले मध्यम आचेवर परतून घ्यावे. मिरची पेस्ट घालावी.व्हिनेगर आणि कॉर्न फ्लोअर एकत्र करून घ्यावे. तेल सुटायला लागल्यावर त्यात व्हिनेगर-कॉर्न फ्लोअरचे मिश्रण आणि मीठ घालावे. चांगल्याप्रकारे परतावे.
३)सगळ्यात शेवटी साखर घालावी. साखर लागली कडेला की गॅस बंद करावा.

टीप :
१) हा सॉस काचेच्या बाटलीत बंद करुन ठेवावा. ६-७ दिवस टिकतो. आणि Schezwan Fried Rice बनवायला सोपे पडते.

Labels:
schezwan Sauce, Indo chinese recipe, Schezwan Fried Rice, Scheshuan recipe, scheshuan sauce.

Schezwan Sauce

Schezwan Sauce in Marathi

Ingredients:
10 Dried Red Chilies
1 Tbsp finely chopped Garlic
1 Tbsp Ginger Paste
1 Tbsp finely chopped Onion OR finely chopped Green Onion
½ Tbsp Corn Flour or Corn Starch
1 Tbsp vinegar (brown or white)
Sugar and salt to taste
3 Tbsp Oil

Method:
1) Boil 1 Cup water. Put broken red chilies into hot water. After 3-4 hours chilies will become soft. Drain. Grind soaked chilies to fine paste. Don’t add water while grinding.
2) Heat 2-3 tbsp oil in a saucepan. Add and sauté Garlic, Onion and ginger on high heat. Add chili paste. Mix vinegar and corn Flour together. Remove all the lumps. After a minute add vinegar-Corn Flour mixture and salt. Sauté well.
3) Add approximately 1 tsp sugar. Keep heat on high and sauté. After a minute turn off the heat. Let it cool down.

Note:
1) Store this sauce in airtight glass jar. It will remain fresh for 5-6 days. It will help to make Schezwan Fried Rice instantly.

Monday, August 20, 2007

Thirty Minute Henna Hand

traditional henna pattern for back of hand fine lines

I must thank Cindy for the "loan" of her hand. She made it possible for me to practice a new design, as fast as I could.

The tip of the cone was cut very small, which made it easy to do her fingers, and all the fine lines on the back of her hand. To get the heavier lines I had to double some of the fine lines, which took a bit longer than I wanted it to.

I started at the fingertips and worked backward from there. I wanted to be sure that the ribbon that "draped" the back of the hand was in the proper place & the easiest was was backwards.

Of course I now have my super portable, very comfortable, ne,w drum chairs which make the henna process so much easier.

I got them at Midnight Sun of course! They are little round bamboo stools that look like djembes colorful, water-proof and very steady to sit on.

Cindy's hand is resting on the top of the stool (they make great photo backdrops as well.)

Saturday, August 18, 2007

कसेडिया - Quesadilla Indian

Chakali's Version of Quesadilla

कसेडिया हा मेक्सिकन पदार्थ आहे. यामध्ये मुख्यतः चीजचा जास्त वापर केला जातो. Quesadilla हा शब्द Queso या स्पॅनिश शब्दावरून तयार झाला आहे. स्पॅनिशमध्ये Queso म्हणजे चीज.
मक्याच्या किंवा गव्हाच्या पोळ्यांमध्ये {ज्याला Tortilla असे म्हटले जाते} आवडत असलेल्या पदार्थांचे स्टफिंग करून हा पदार्थ बनवला जातो. स्टफिंग मध्ये वेगवेगळ्या भाज्या किंवा नॉन-वेजिटेरियन लोकांना खिम्याचा ही वापर करता येतो. मी हाच पदार्थ थोडा भारतीय लूक देऊन बनवला आणि मला तो खूप आवडला. त्याची कृती खालीलप्रमाणे :

पोळ्या/ चपात्या


साहित्य

तयार कसेडिया

साहित्य :
२ छोट्या चपात्या/ फुलके (भाजून)
१ छोटा कांदा
१ छोटा टोमॅटो
अर्धी भोपळी मिरची
पाती कांदा
१ हिरवी मिरची
बटर
किसलेले चीज (मेक्सिकन चीज ब्लेण्ड मिळाल्यास उत्तम)
चाट मसाला
मीठ
ग्रील करण्यासाठी सॅण्डविच टोस्टर

कृती :
१) प्रथम कांदा, टोमॅटो, भोपळी मिरची उभी चिरून घ्यावी. पाती कांद्याची फक्त पात घेऊन ती एकदम बारीक चिरावी.
२) दोन पैकी एका पोळीला एका बाजूने थोडे बटर लावून घ्यावे, त्यावर थोडे मीठ पेरावे.
३) प्रत्येक पोळीवर चिरलेला कांदा, टोमॅटो, भोपळी मिरची आणि पाती कांदा घालावा. हिरवी मिरची बारीक चिरून पोळीवर घालावी. वरुन चाट मसाला आणि मीठ घालावे.
४) शेवटी थोडे किसलेले चीज घालावे. दुसरी पोळी कांदा टोमॅटो घातलेल्या पोळीवर ठेवावी.
५) वरुन हलक्या हाताने थोडा दाब द्यावा. आणि टोस्टरमध्ये घालावे. कसेडीया टोस्टरमध्ये चांगला ग्रील करून घ्यावा. त्यावर थोडे बटर लावावे आणि थोडा चाट मसाला लावावा. आणि गरम गरम खावा.

टीप :
१) जर सॅण्डविच टोस्टर उपलब्ध नसेल तर कसेडीया तव्यावरही करू शकतो.
२) आवडीनुसार मश्रुम, गाजर व इतर भाज्या घालू शकतो.
३) आदल्या दिवशीच्या पोळ्या संपवण्यासाठी कसेडीया हा उत्तम पर्याय आहे.

चकली

Henna Tattoo FAQ

Mehndi, or henna tattoo, is a natural form of temporary body decoration. Henna Tattoo will always be some shade of reddish brown. The finished color depends on your skin type & how long you let the paste stay on your skin. The longer the paste remains the deeper the finished color. Your design will darken over the first 48 hours.

To prepare your skin for Mehndi, please wash the skin surface to remove any oils, lotions and dry skin. Mehndi works best on the palm of the hands, the feet & the tender skin of the inner arm. Designs on the back of the hands, arms, or other parts of the body do not last as long, nor does the color take as well. After your design is completed, a glaze of lemon-sugar may be applied at regular intervals to secure the paste to the skin and enhance the final color.

Please try to leave the paste in place for at least three hours. For best results leave the paste in place for 6 hours, or overnight. To remove, scrape the hardened paste off the skin. Use a vegetable oil to remove any remaining paste before washing the design.

Aftercare: If possible, avoid wetting the design area for at least 12 hours. Moisturizing the design twice daily with a vegetable oil will help make the design last. The design can remain visible on the skin for one to 3 weeks. This is a photo of henna paste On the skin. The finished color will be a shade of red to reddish brown.

Friday, August 17, 2007

Om Armband - from Catherine Cartwright Jones

Here is a fun little Om arm band tattoo. Traditionally, henna is applied to the palms of the hands, back of the hands, forearms, feet and ankles. The deep red to brown color of premium henna is best in these places.

Most drop-in customers choose patterns for the back of the hands, belly and the lower back.... similar to where one might put ink.

If you choose to put your henna in one of these locations, please remember to leave the paste on as long as possible & to get as warm as you can. You will get the best finished color if you Do Not wear moisturizer, sun block or other body lotions on henna day.

Thursday, August 16, 2007

Tips for successful henna tattoo on the feet

These are photos of henna paste on the skin. The natural dye in the henna is staining the skin UNDER the black paste you see in the photo. When the paste is removed, the stain is visible and will darken over the next 48 hours. The quality of finished color depends in part on how you care for your design.

The peacock pattern is very popular, and is one that works great with flip flops! Of course, it's best to leave your shoe on when getting your henna so we can be sure the flip won't flop into your paste.

The second design is great for henna parties where you are free to wander barefoot in your home or other party venue. Bare feet enable the artist to get creative, make henna sandal designs, and all sorts of wonderful art.

There are more photos of henna designs for the feet in this blog, and on my new henna website. I am sure I have a good link to some bridal henna on myspace!

Here are a few tips for good color and a successful henna design on the feet:

  • Have your pedicure before you come for henna.
  • Wear flip flops or shoes that leave lots of room for your new tattoo.
  • Leave the paste on as long as possible.
  • Avoid air conditioning (really.. henna gives the best color in hot weather).
  • Be sure to protect your finished tattoo with olive oil before getting it wet.
  • It is best to stay out of the pool for a day or two so that your henna has time to darken.

If you are feeling really relaxed & indulgent, you can always have henna on the soles of your feet. I will have a few photos of this fabulous art online in my new galleries soon.

Of course there are lots of wonderful artists publishing all kinds of pattern books. Some are available online at Amazon.com, but be sure to visit Tap Dancing Lizard for more great ideas.

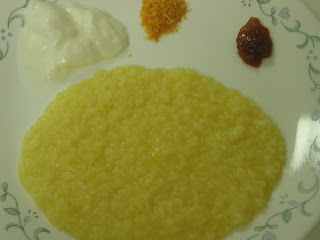
मुगाळं - Mugale

Mugale in English

वाढणी: ३ जण
Indian spiced rice, rice recipes, restaurant style food, indian grocery, quick and easy
साहित्य:
१/२ कप तांदूळ
पाव कप मूगडाळ
१/४ टिस्पून हळद
चिमूटभर हिंग
मीठ
तूप

कृती:
१) कूकरच्या डब्यात तांदूळ आणि मूगडाळ एकत्र करून त्यात अडीचपट पाणी घालावे. त्यात हळद आणि हिंग घालावे. प्रेशर कूकर मध्ये ४-५ शिट्ट्या कराव्यात.
२) १० मिनिटांनी कूकरमधले शीजलेला भात आणि डाळ पातेल्यात काढून त्यात थोडे पाणी घालून भात हवा तेवढा पातळ करावा. रवीने भात एकजीव करून घ्यावा. चवीपुरते मीठ घालावे. गरम गरम खावा. खाताना लिंबाचे गोड लोणचे, दही, मेतकूट घ्यावे.

आजारपणात हलका आहार घ्यायला सांगतात. त्यासाठी हा पदार्थ उत्तम. मी आजारी असताना माझी आई मला हेच बनवून द्यायची. :-)

Labels:
healthy food, diet food, mugale, maubhat

Mugale

Mugale in Marathi


Ingredients:
1/2 cup Rice
1/4 cup Yellow Moong Dal
1/4 tsp Turmeric Powder
Pinch of Asafoetida Powder
salt to taste
Ghee

Method:
1) Wash Dal and Rice together under running water. Add washed Rice and Dal and around 2 cups of water. Also add Turmeric and Asafoetida powder. Pressure cook to 5 whistles and turn off heat.
2) Wait for 15 minutes. Open pressure cooker and transfer cooked Rice and Dal to other saucepan. Add little water to adjust the consistency. Blend with hand blender to make the mixture little gooey. Add salt to taste and 1 tbsp Ghee. Rice should be medium thick consistency. It should not be too runny or too thick.
Serve hot with Lemon Pickle, plain yogurt and Metkut

Sunday, August 12, 2007

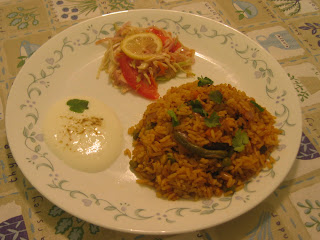
वेजिटेबल बिर्याणी - Vegetable Biryani

Vegetable Biryani in English

homemade biryani recipe, Vegetable biryani, indian restaurant style recipe
साहित्य:
१ कप बासमती तांदूळ
२ मध्यम कांदे उभे चिरून
१/२ कप मटार
५-६ फ्लॉवरचे तूरे अर्धा कप गाजर आणि फरसबीचे तुकडे (आवडत असलेल्या भाज्यांचे तुकडे सुद्धा घालू शकतो)
२ मध्यम टॉमेटोची प्युरी (टोमॅटो शिजवून त्याची साले काढावीत आणि मिकसरवर प्युरी करावी)
८-९ काजू बी
१ टेस्पून लसूण पेस्ट
१ टेस्पून आले पेस्ट
१/२ कप दूध
पाव ते अर्धा कप दही
१ टेस्पून तूप
१/२ टिस्पून लाल तिखट
१/४ टिस्पून हळद
१ टेस्पून वेजिटेबल बिर्यानी मसाला
चवीपुरते मीठ
२ टेस्पून तेल

कृती:
१) तांदुळाच्या अडीचपट पाणी घेऊन त्यात १/२ चमचा तेल आणि पाऊण चमचा मीठ घालावे. त्यात तांदूळ घालावे. वरुन झाकण ठेवून तांदूळ शिजू द्यावे. (तांदूळ पूर्ण शिजवू नयेत. अगदी किंचित कच्चे ठेवावे) उरलेले पाणी काढून घ्यावे. आणि तयार भात परातीत मोकळा करून ठेवावा.
२) भाज्या अर्धवट शिजवून घ्याव्यात (गाजर, फारसबी, फ्लॉवर.. वगैरे)
३) नॉनस्टिक फ्राईंग पॅनमध्ये ३ चमचे तेल घेऊन त्यात कांदा, काजू बी, आले-लसूण पेस्ट घालावी. २ मिनिटे मंद आचेवर परतून त्यात टोमॅटो प्युरी घालावी. १ चमचा लाल तिखट, अर्धा चमचा हळद घालून झाकण ठेवून वाफ काढावी. नंतर त्यात फेटलेले दही, बिर्याणी मसाला घालून ढवळावे. शिजवलेल्या भाज्या आणि थोडे मीठ घालावे.
४) दुसर्‍या नॉनस्टिक पॅनमध्ये अर्धा भाग शीजलेले तांदूळ पसरावे, त्यावर तयार ग्रेवी (टोमॅटो प्युरी आणि भाज्या) घालावी. आणि त्यावर उरलेला अर्धा भाग भात पसरावा.
५) १/२ कप दूध घालून मंद आचेवर १०-१२ मिनिटे वाफ काढावी. बिर्याणी तयार झाल्यावर त्यात कडेने तूप सोडावे.

टीप:
१) जर ओव्हनमध्ये बिर्याणी करायची असेल तर ओव्हन ४०० F प्रिहीट करावे. ओव्हनसेफ भांड्यात क्रमांक ४ व ५ मध्ये दिल्याप्रमाणे भाताचा व भाजीचा थर लावावा. वरून अल्युमिनीयम फॉईलने भांडे बंद करावे व १५ मिनीटे ओव्हनमध्ये ठेवावे.

Labels:
vegetable Biryani, easy recipe of Biryani, Dum Biryani, veg biryani recipe

Vegetable Biryani

Vegetable Biryani in Marathi

homemade biryani recipe, Vegetable biryani, indian restaurant style recipe, how to make Biryani, Rice recipes, Indian Exotic spices food, whole food, fat burnIngredients:
1 cup Basmati Rice
2 medium Onion, sliced lengthwise
½ cup Peas
5-6 Florets of Cauliflower
½ cup Carrot and French beans pieces (Add other veggies of your choise)
Puree of 2 medium Tomato (boil tomatoes in hot water until starts leaving skin. Peel and purée)
8-9 Cashew Nuts
1 tbsp Garlic Paste
1 tbsp Ginger Paste
½ cup Milk
¼ to ½ cup Plain Yogurt, well beaten
1 tbsp Ghee
½ tsp Red Chili Powder
¼ tsp Turmeric Powder
1 tbsp Vegetable Biryani Masala
Salt to taste
2 tbsp Oil

Method:
1) In a deep saucepan boil 2½ cup water. Add ½ tbsp Oil and ½ tbsp Salt. Then add 1 Cup Basmati Rice. Let it cook on Medium heat. Cover with lid for few minutes. Do not cook rice completely. Let it be uncooked slightly. Drain and transfer rice to a flat plate for cooling.
2) Cook vegetables. Do not overcook them, Keep them uncooked slightly.
3) Heat a nonstick pan; add 2-3 tbsp oil and sauté Onion, Cashew nuts, Ginger-Garlic Paste. Sauté for 2 minutes on medium heat. Then add Tomato Puree, ½ tsp Red Chili Powder, ½ tsp Turmeric Powder. Cover and cook for 2-3 minutes. Then add Yogurt, Biryani masala and mix well. Then add cooked vegetables and very little salt. Let it cook for few minutes.
4) In other pan spread rice and make a layer. Then make layer of gravy. Again make Rice Layer followed by layer of Gravy. Make 3-4 more layers like this.
5) Pour ½ cup milk over the surface. Cover pan with lid and let it cook for 10-12 minutes. Keep the heat on medium. Once Biryani is ready, drizzle Ghee over Biryani to enhance richness.

Note:
1) To make Biryani in the Oven, preheat oven to 400 F. Grease an oven safe container. Layer rice and gravy in Oven safe container as explained in step 4 & 5. Cover with lid (Oven safe) or Aluminum Foil. Keep the container for 15 minutes in preheated oven.

Thursday, August 9, 2007

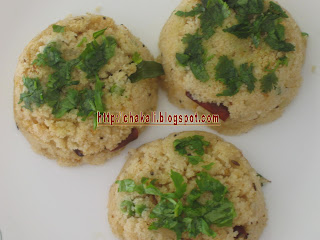
उपमा - Upama

Upma in English

rava recipe, upama, upma, low calorie food, low carb food, indian exotic spicy food
साहित्य:
१/२ कप रवा
सव्वा ते दिड कप पाणी
१/२ कप कांदा बारीक चिरुन
१ टेस्पून तेल किंवा २ टिस्पून तूप
फोडणीसाठी : १/४ टिस्पून मोहोरी, १/४ टिस्पून जीरे, १/४ टिस्पून हिंग
२-३ मिरच्या बारीक चिरुन
३-४ कढिपत्त्याची पाने
१/४ टिस्पून किसलेले आले
१/२ टिस्पून उडीद डाळ
३-४ काजू बी (ऑप्शनल)
चवीनुसार मीठ
१ टिस्पून साखर
२ टेस्पून बारीक चिरलेली कोथिंबीर
२ टिस्पून लिंबूरस

कृती:
१) सर्वप्रथम रवा व्यवस्थित भाजून घ्यावा.
२) मध्यम आचेवर कढईत तेल/तूप गरम करून त्यात मोहोरी, जीरे, हिंग, आले, उडीद डाळ घालावी. उडीद डाळ लालसर झाली कि कढिपत्ता, मिरच्या, काजू घालून फोडणी करावी. चिरलेला कांदा परतून घ्यावा. आवडत असल्यास टोमॅटोच्या ४-६ फोडी घालाव्या.
३) रवा घालून २-३ मिनिटे मध्यम आचेवर परतावे. दुसर्या शेगडीवर पाणी गरम करत ठेवावे. त्यात आधीच अर्धा चमचा मीठ आणि थोडी साखर घालावी. त्यामुळे उपम्याला मीठ व्यवस्थित लागेल.
४) पाणी चांगले गरम झाले की कढईत घालावे. आणि ढवळून वरून झाकण ठेवावे. १ मिनिटाने उपम्याची चव बघून मीठ adjust करावे. वाफ काढावी.
५) उपमा तयार झाला कि डिशमध्ये काढावा वरून कोथिंबीर घालावी, लिंबू पिळावे.

टीप :
१) काही जणांना उपमा अगदी मऊसर लागतो त्याप्रमाणे अर्धा वाटी गरम पाणी जास्त घालावे.
२) उपम्यावर बारीक शेवसुद्धा छान लागते.

Labels:
Upama, Upma recipe, South Indian Upma recipe, Indian Snack

Upama

Upma in Marathi

healthy breakfast, low calorie food, Upma recipe, Indian Breakfast recipe, breakfast recipe, upama recipe, South Indian FoodIngredients:
½ cup Semolina (Farina)
1¼ to 1½ cup Water
½ cup Onion, finely chopped
2 tbsp Oil OR 2 tsp Ghee
For Tempering: ¼ tsp Mustard Seeds, ¼ tsp Cumin Seeds, ¼ tsp Asafoetida Powder
2-3 Green Chilies, finely chopped
3-4 Curry Leaves
¼ tsp grated Ginger
½ tsp Urad Dal
3-4 Cashew Nuts
Salt to taste
1 tsp Sugar
2 tbsp finely chopped Cilantro
2 tsp Lemon juice

Method:
1) Roast Semolina on medium heat until golden brown. Keep stirring while roasting, otherwise it could burn.
2) Heat a wok. Keep the heat on Medium. Add Oil and temper with Mustard seeds, Cumin Seeds, Asafoetida powder, Ginger, and Urad dal. Let Urad dal become Pinkish red, and then add Curry leaves, green Chilies, Cashew nuts. Stir for 10 seconds. Then add chopped Onion. Let it become translucent. You can add ¼ cup finely chopped tomato for flavor.
3) Then add roasted semolina and sauté. While sautéing heat 1½ cup Water on other stove top. Add salt and sugar to the water. This will spread salt evenly to Semolina.
4) Once water starts boiling add it to Semolina. Stir well and lower the heat. Cover wok with lid and let it cook for few minutes.
5) Once Upma is done, garnish with Cilantro. Add Lemon juice and serve hot.

Note:
1) Some people like very moist Upma, so add extra ½-cup hot water.

Labels:
Upama, Upma recipe, South Indian Upma Recipe, Indian breakfast

Monday, August 6, 2007

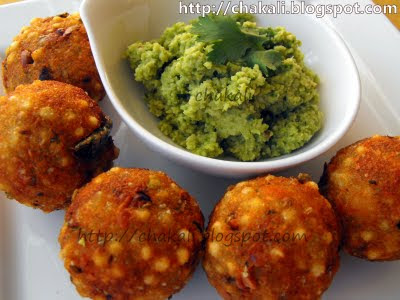
Sabudana Vada

Sabudana Vada in Marathi

Sago Patties - Crispy, delicious and one of the most popular Maharashtra's traditional snack.

Serves: 15 medium vada
Time: 30 minutes

sabudana vada, upasache padarthIngredients:
1 Cup Sabudana (Sago)
2 big potatoes, boiled
5-6 Green Chilies (finely chopped)
1/2 Cup fresh cut Cilantro
1/2 teaspoon Cumin Seeds
1/2 cup roasted peanuts powder
Lime juice of 1/2 lime
salt to taste
Oil for deep frying

Method :
1) Rinse Sago with water drain/remove excessive water. Cover and keep aside for 4 to 5 hours.
2) Peel the boiled potatoes and mash them.
3) Mix sago, mashed potatoes, cilantro, green chillies, peanut powder, lime juice, salt in a mixing bowl. mix it well .Make a dough. Don't knead too much, it should not become sticky.
4) Make tight round balls (2 inch diameter) or flat patties of this mixture.
5) Heat oil in a frying pan. Deep fry vadas (sago balls) over medium high heat.
6) Serve with Coconut+cilantro+green chili Chutney.

Friday, August 3, 2007

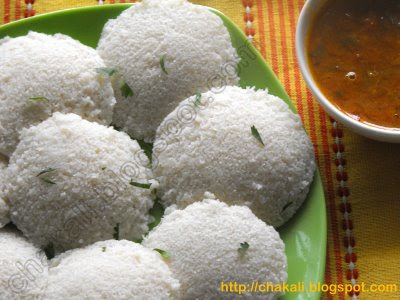
इडली- Idli

Idli in English


idli sambar, idali recipe, rice cakes, steamed rice cakes, indian rice idlisसाहित्य:
१/२ कप उडीद डाळ
दिड कप इडली रवा
चवीपुरते मिठ
१/४ कप पातळ पोहे
१ टिस्पून साखर

कृती:
१) इडली रवा आणि उडीद डाळ वेगवेगळ्या भांड्यात ५ तास भिजत घालावे. इडली रवा भिजेल इतपतच पाणी घालावे. रवा पातळ करू नये. पातळ पोहे इडली रव्यातच भिजवावे.
२) नंतर भिजलेली उडीद डाळ मिकसरवर अगदी थोडे पाणी घालून एकदम बारीक करून घ्यावी. वाटण एकदम मिळून आले पाहिजे. डाळीचे कण राहता कामा नयेत. भिजवलेला रवा-पोह्याचे मिश्रण, साखर आणि मिठ उडीद डाळीच्या वाटणात घालून एकदा मिक्सरमध्ये फिरवावे. वरुन झाकण ठेवून १० ते १२ तास मिश्रण आंबू द्यावे.
३) मिश्रण आंबले की नीट ढवळून घ्यावे. इडली पात्राला थोडे तेल लावून मिश्रण घालावे. इडली कूकर मध्ये किंवा साध्या मोठ्या कूकर ३ इंच भरेल एवढे पाणी उकळत ठेवावे. (साधा कूकर असेल तर त्याची शिट्टी काढून ठेवावी)
४) पाणी उकळले की भरलेले इडली पात्र आत ठेऊन १२ ते १५ मिनिटे वाफ काढावी. गॅस बंद करून ५ मिनीटे वाफ जिरू द्यावी. इडली पात्र बाहेर काढून इडल्या सुरीने किंवा चमच्याने अलगदपणे काढाव्यात.
नारळाच्या चटणी आणि सांबार बरोबर गरमगरम सर्व्ह करावे.

टीप:
१) जर वातावरण थंड असेल तर इडलीचे पिठ निट आंबत नाही. अशावेळी ओव्हन २५० F वर ३ मिनीटे प्रिहीट करावे. ओव्हन बंद करून इडलीचे मिश्रण झाकून ओव्हनमध्ये ठेवावे. ८ ते १० तास मिश्रण आंबू द्यावे.

Labels:
Idli Sambar, Idali sambhar

Thursday, August 2, 2007

Henna Palm Tattoo - 2007 Jamila Color

I love red henna. It's my favorite color. I know many people love the super dark, almost black/red henna, but I love the ruby red.

Here is a color sample of the 2007 harvest of Jamila henna. The paste stains very quickly, which is great for festivals, but it also gives this lovely color.

Please forgive the pattern. It is not my best work (I was trying a new style a little later in the evening than I usually do) but I had to see the color.

This is color only 12 hours after the paste was removed! More photos coming soon.